Please follow the below steps to configure Microsoft SSO for your organization.
Step 1: Login into Azure Portal.
Step 2: In the left pane, choose Azure Active Directory.
Step 3: On the overview page, choose Enterprise applications.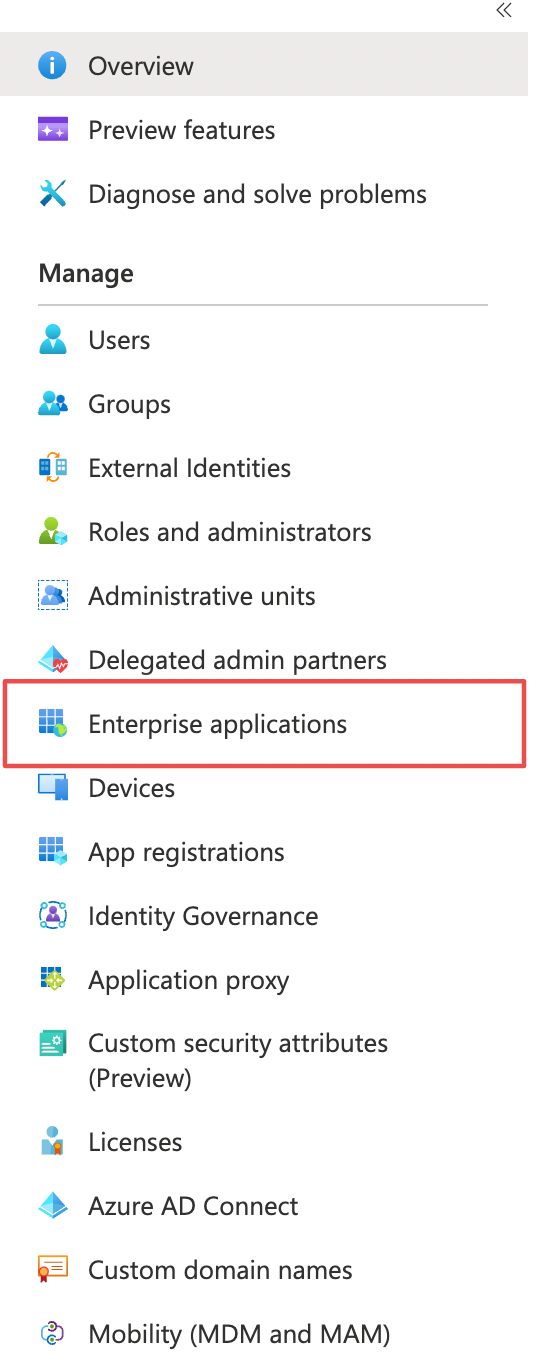
Step 4: Click on New Application 
Step 5: On the Azure AD Gallery, click on Create your own application.
Step 6: In the right pane, enter the name of your application e.g, Genuity Microsoft SSO and select non-gallery application options. After entering the information, click on Create button at the bottom of pane.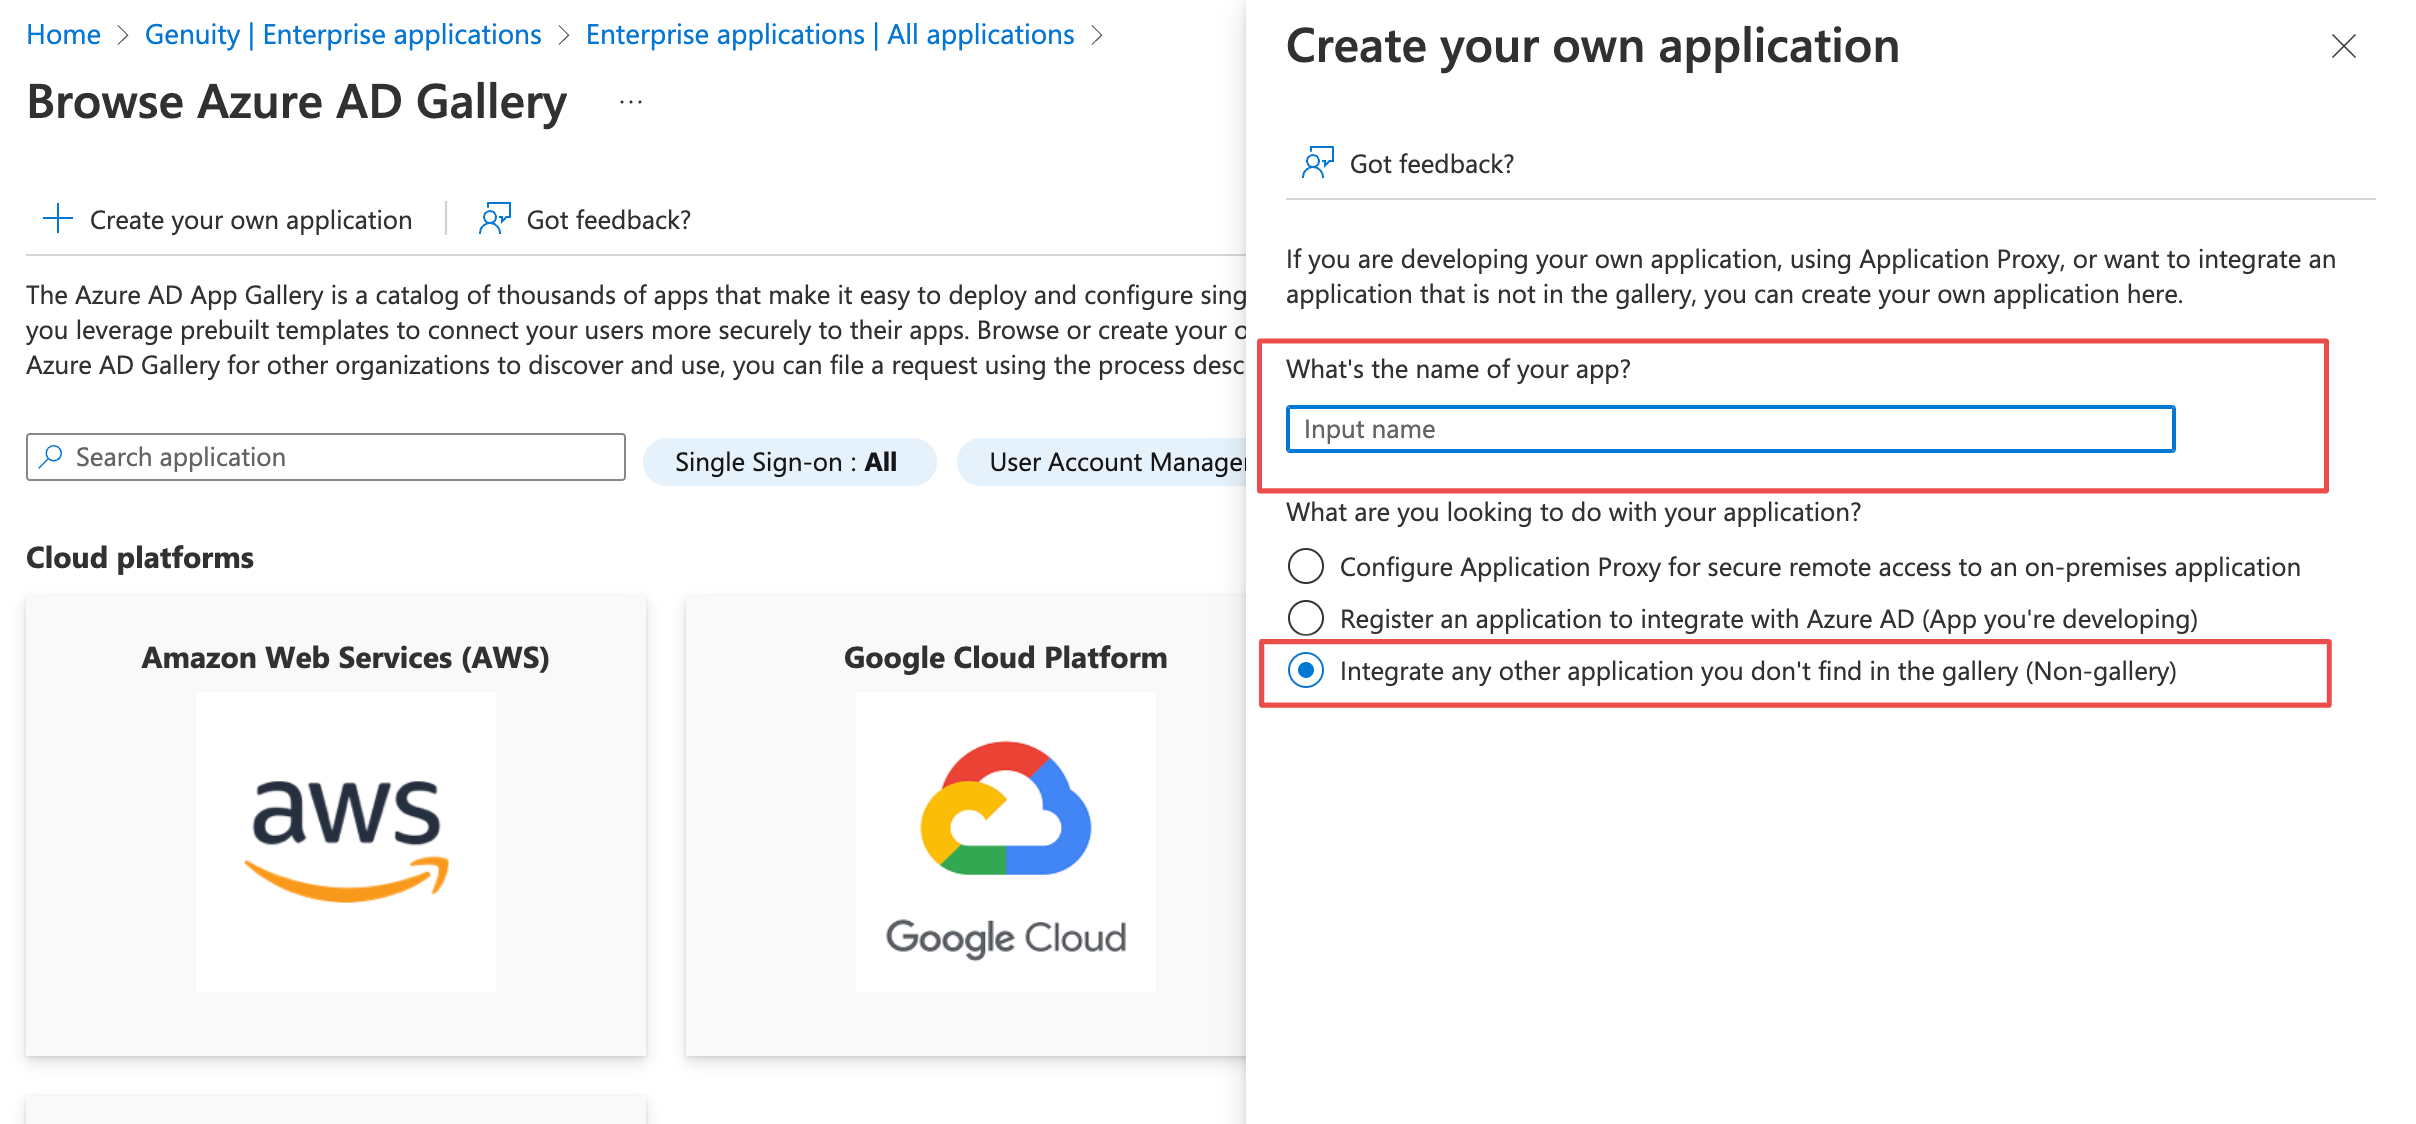
Step 7: After the application is successfully created, choose Set up single sign on.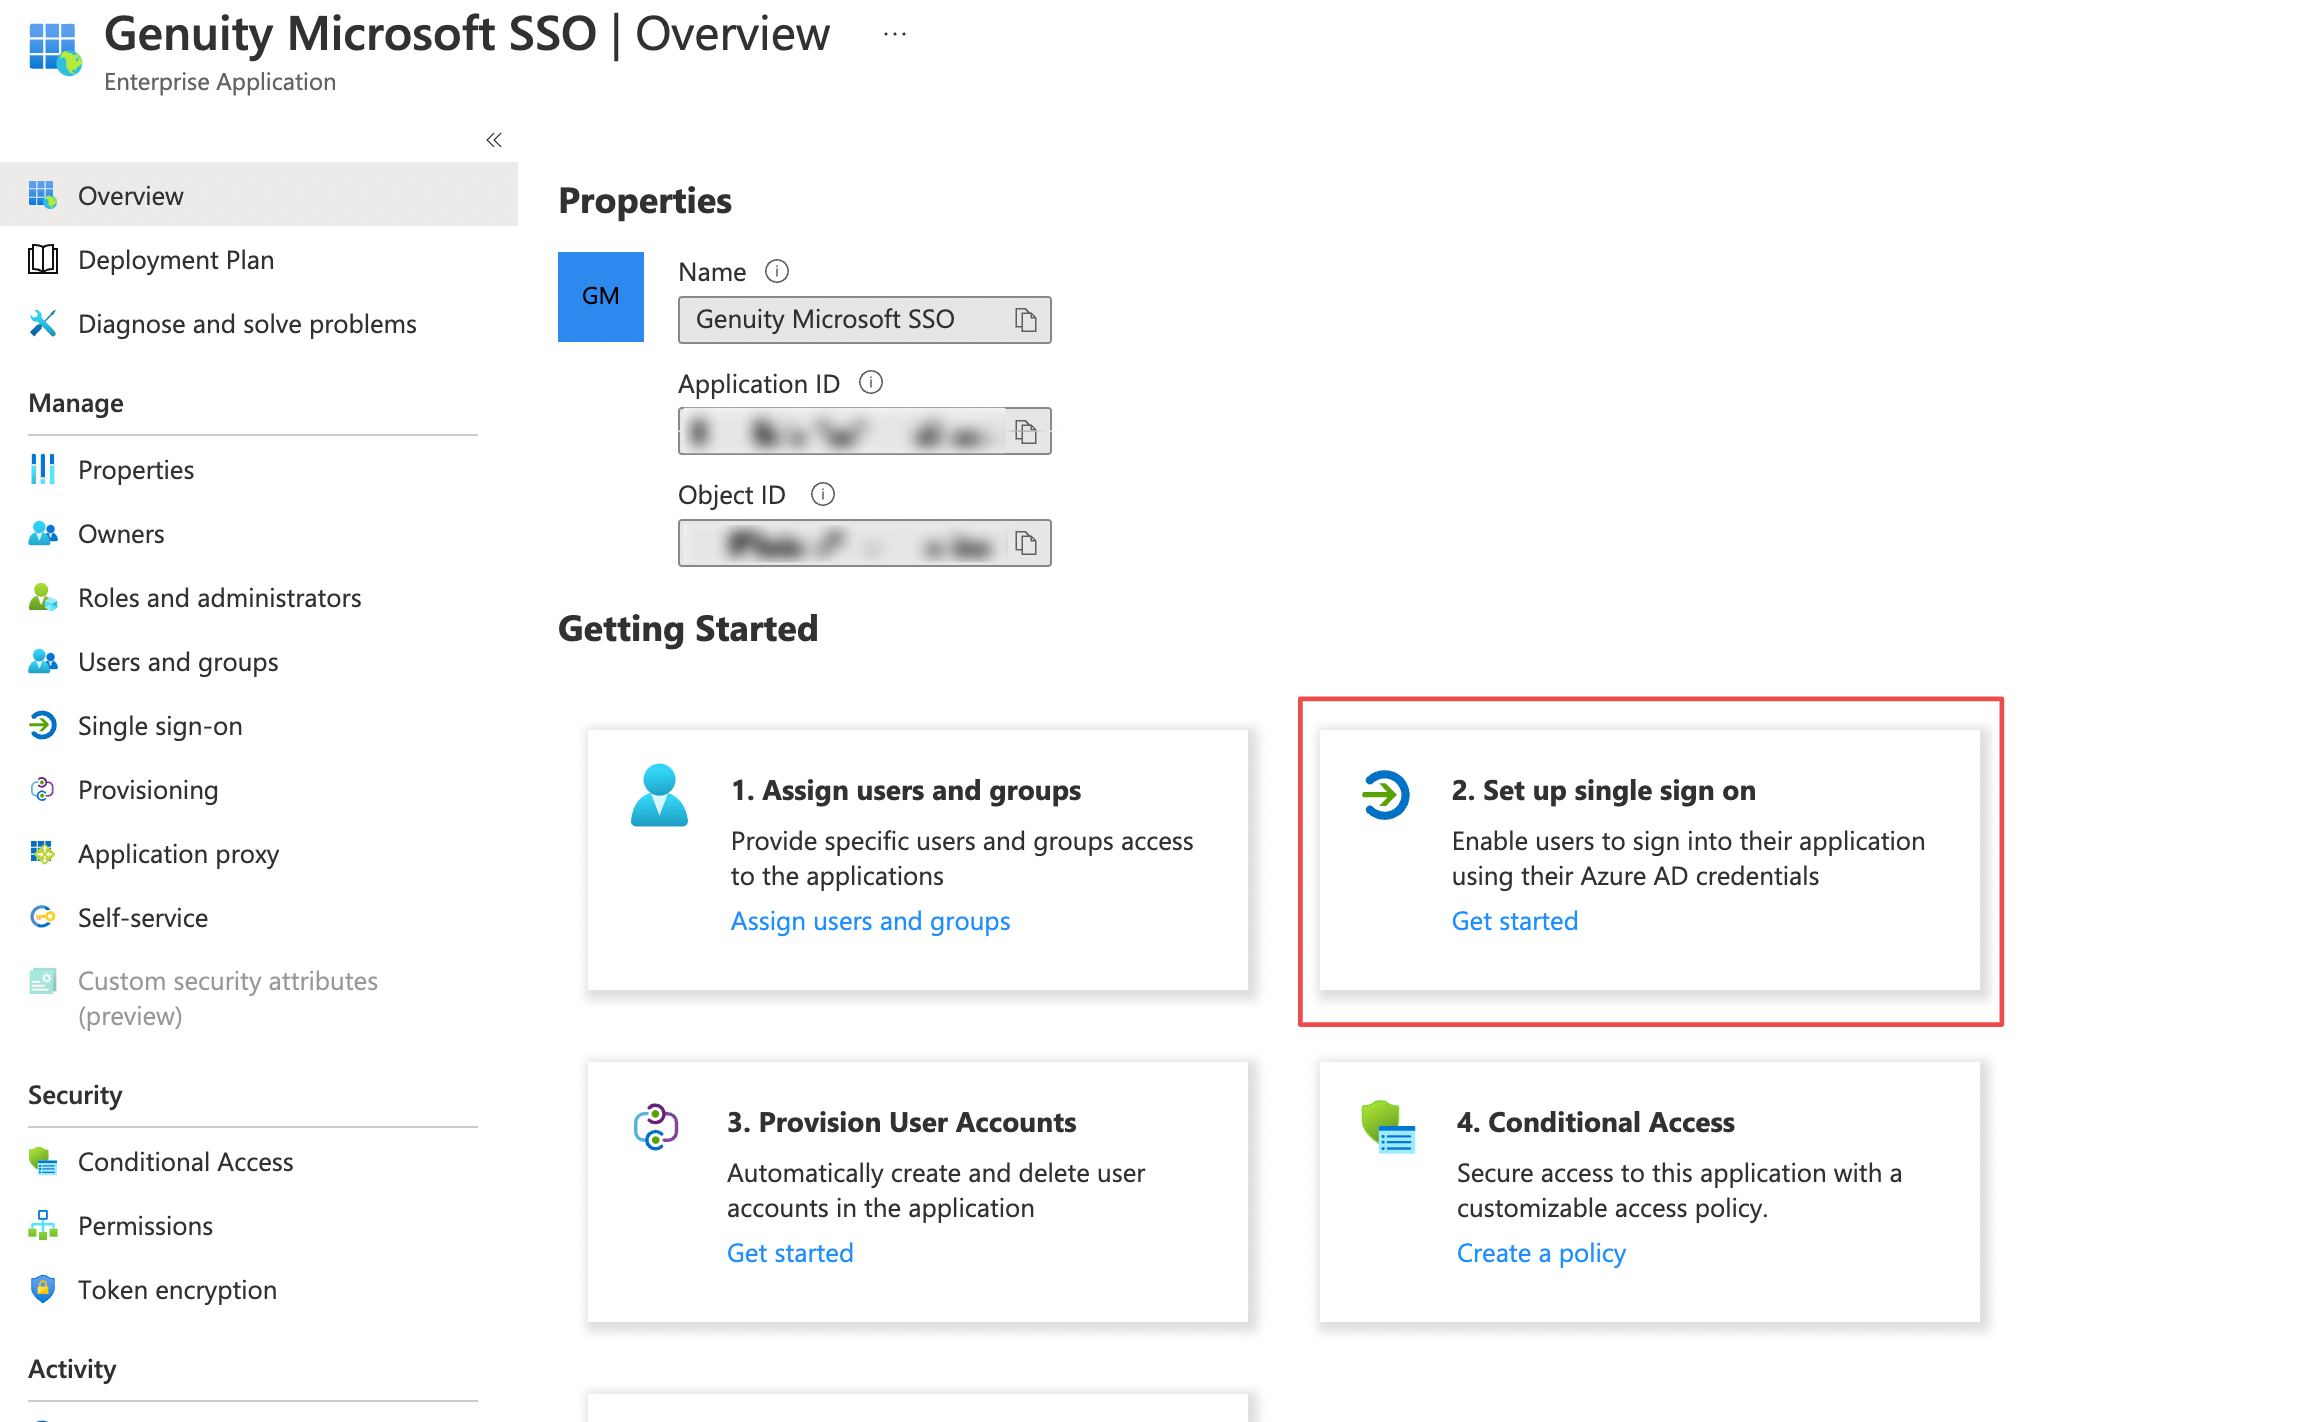
Step 8: Choose SAML as the SSO method.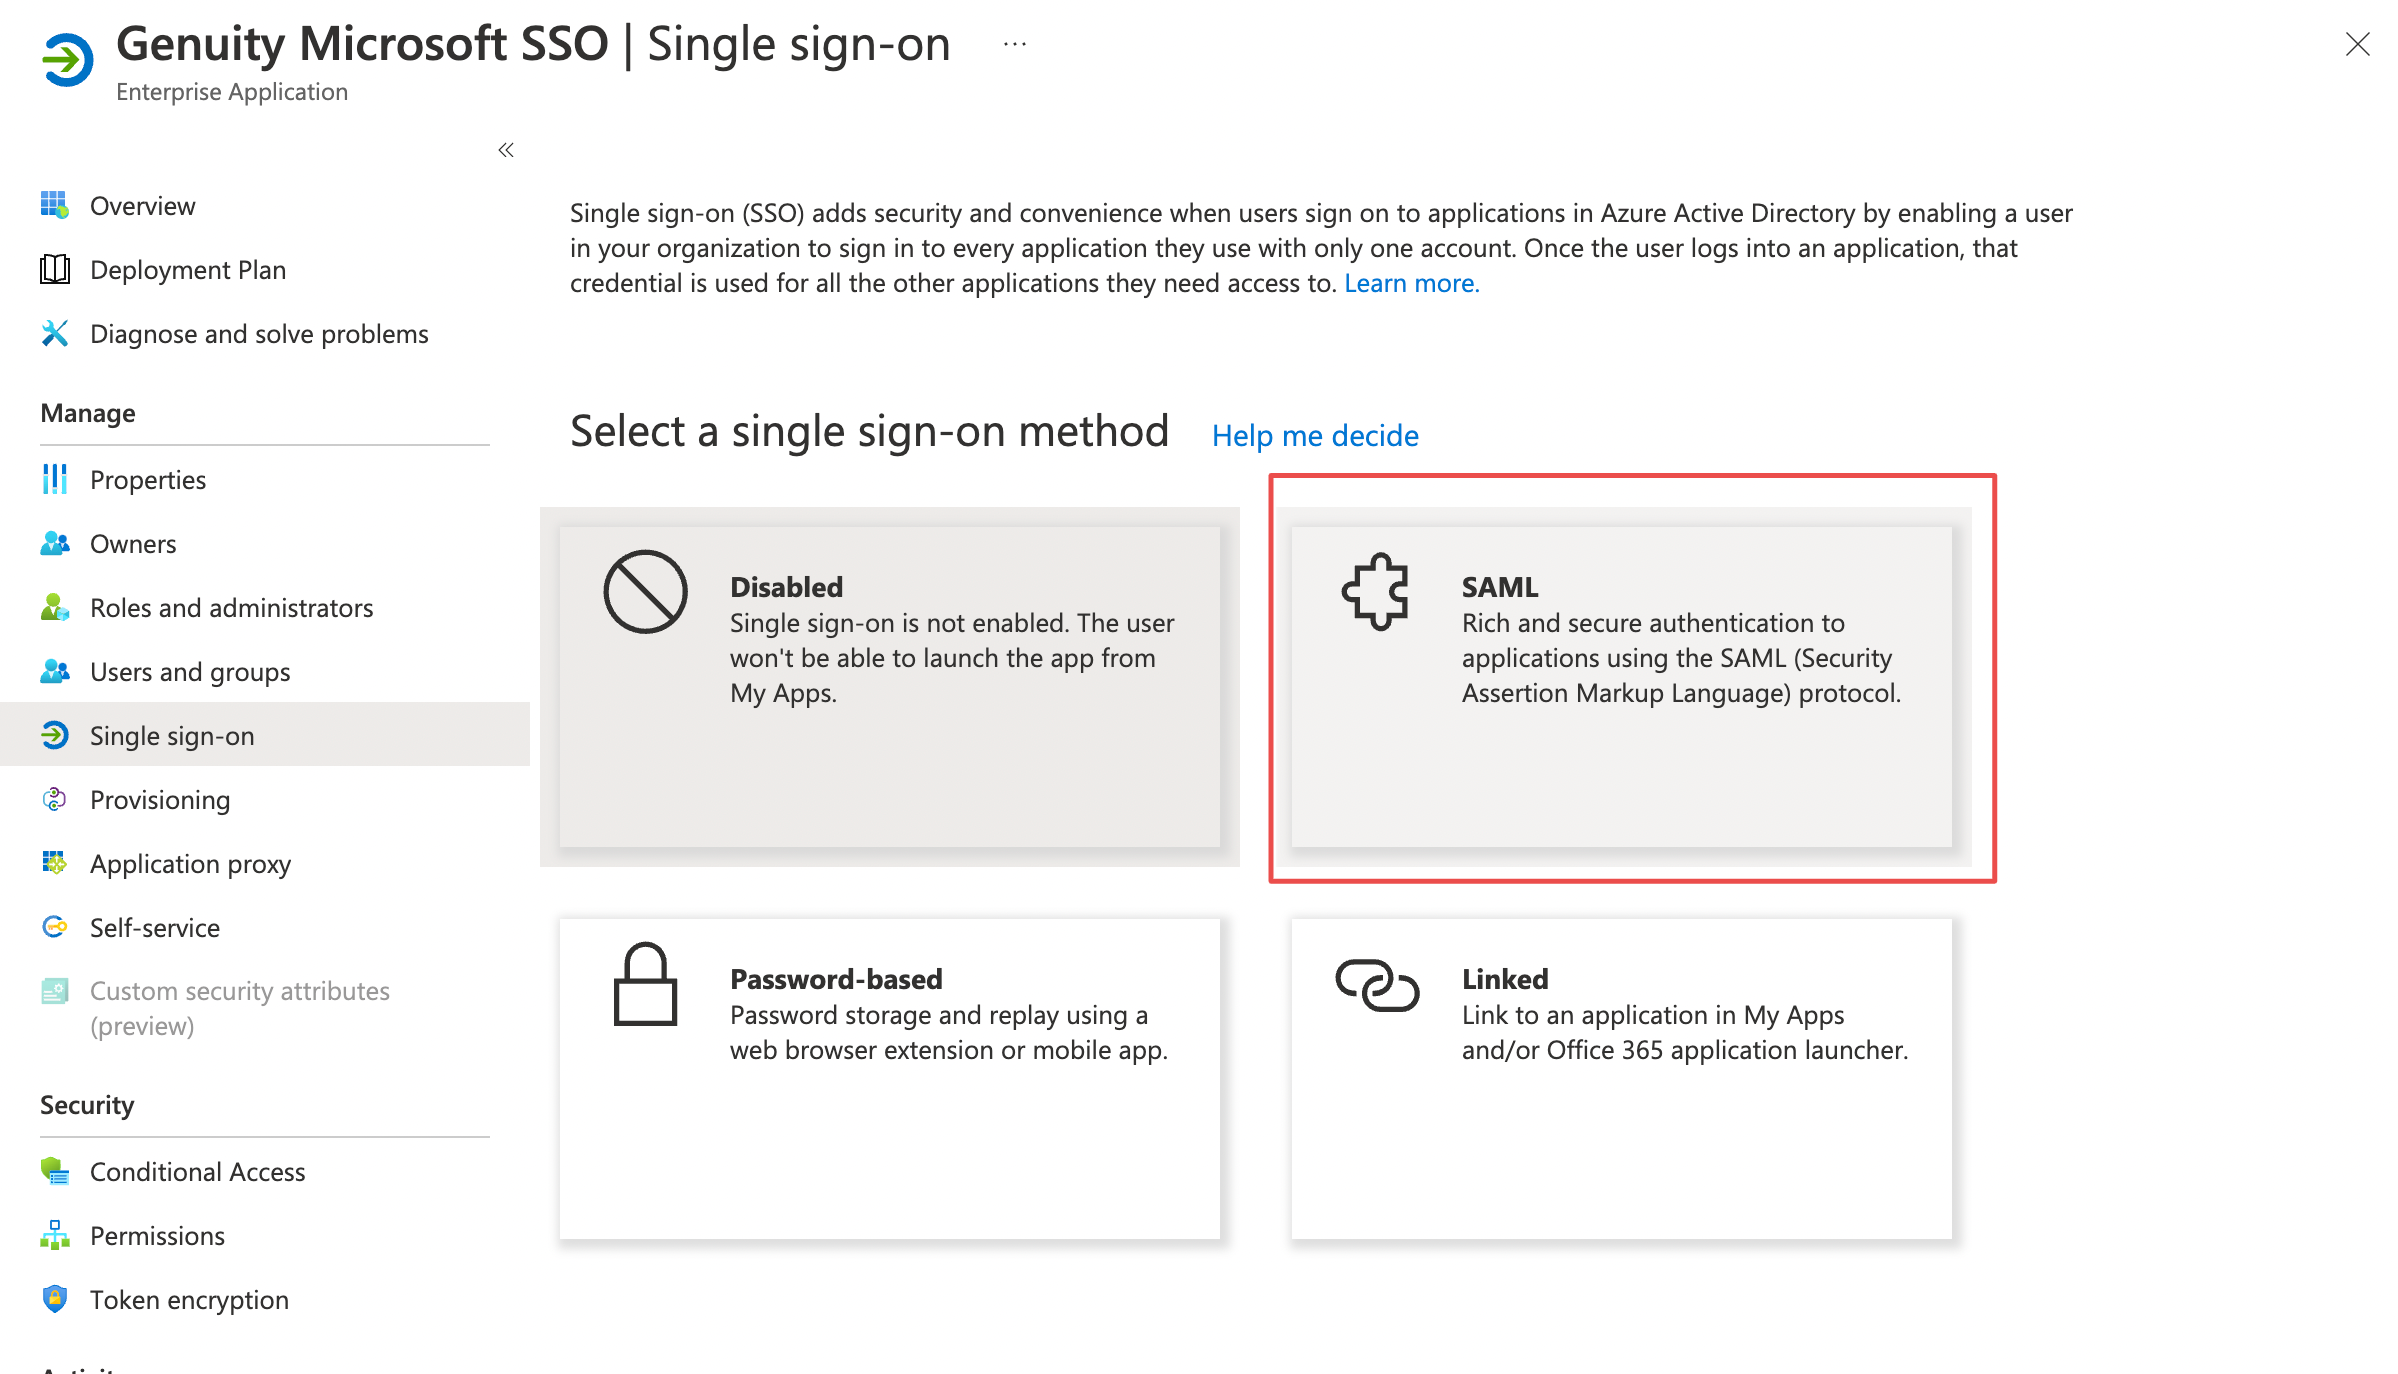
Step 9: Click on Basic SAML Configuration Edit icon. A right pane will be opened.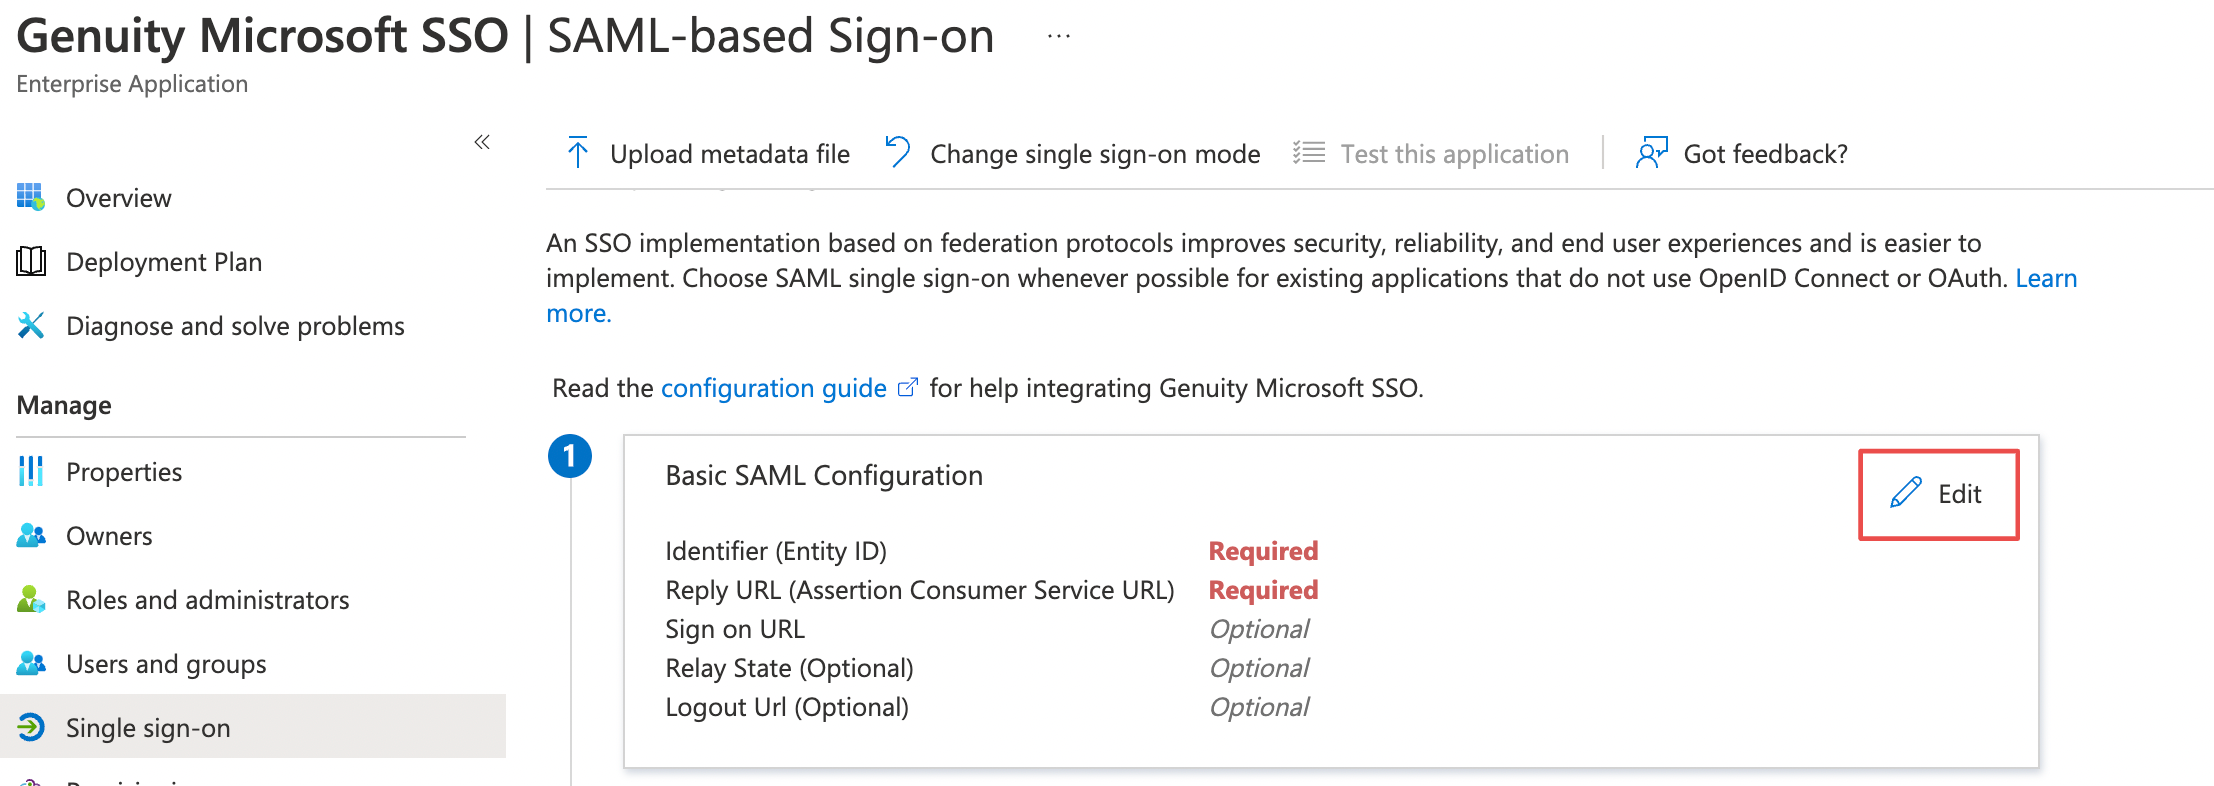
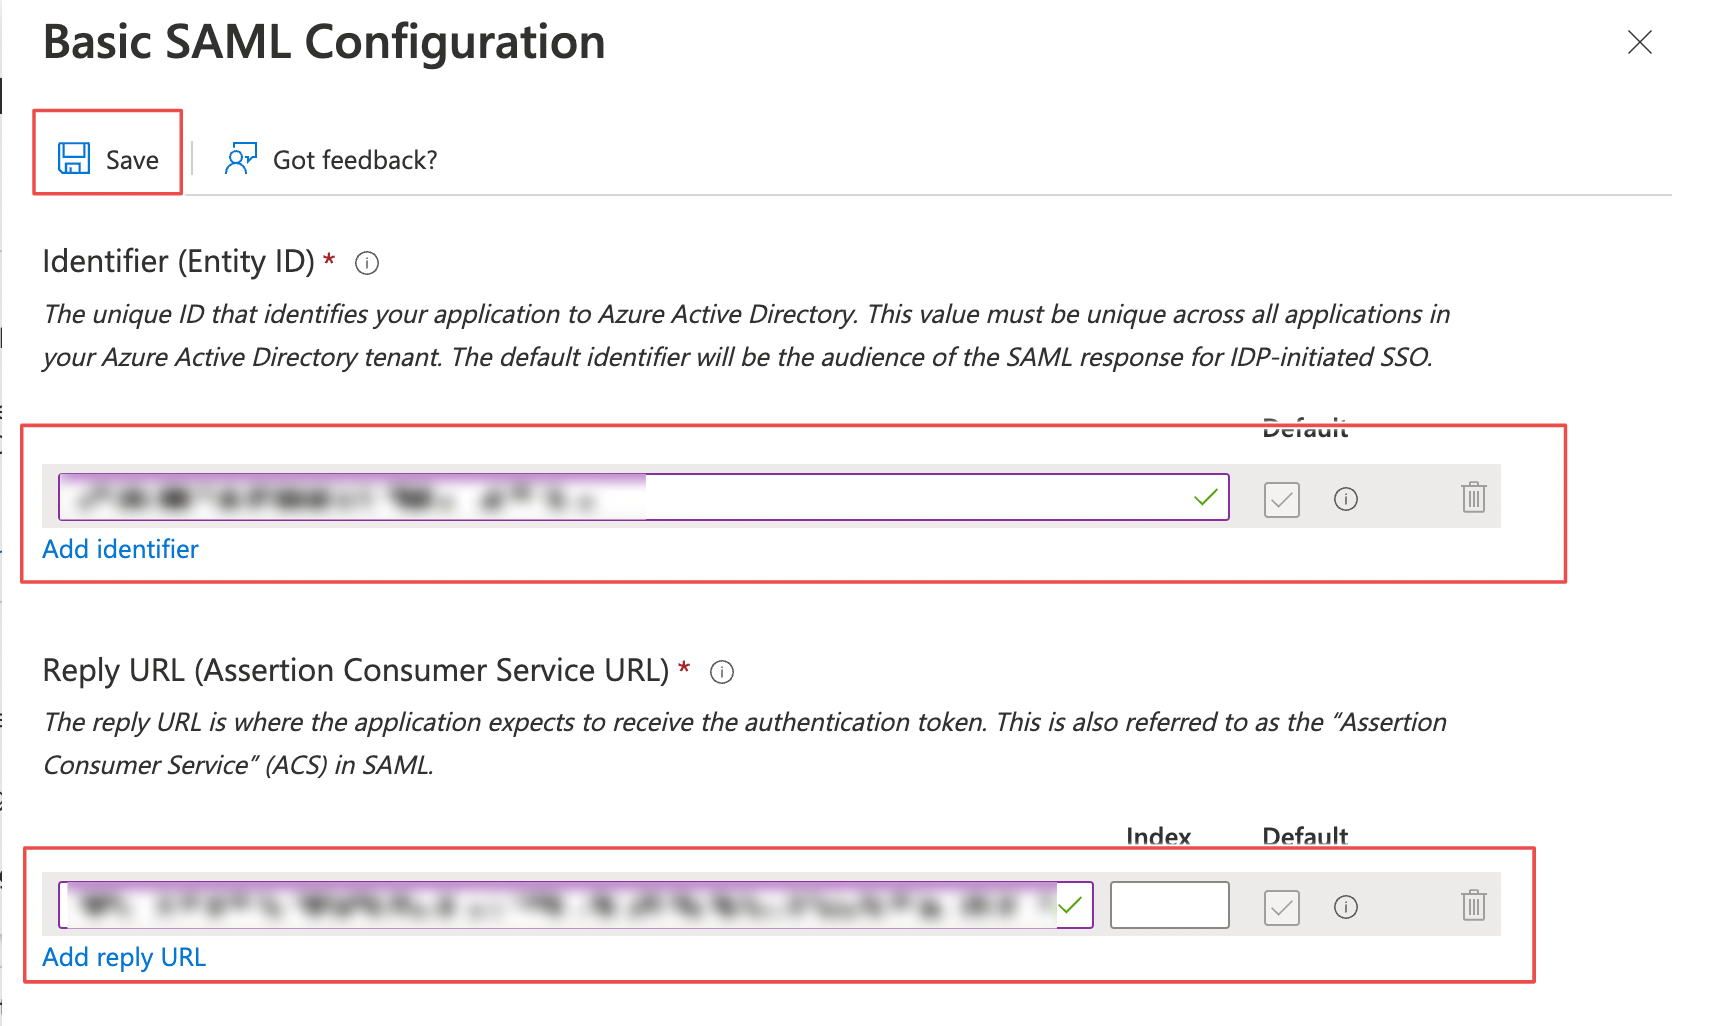
Step 10: Add Identifier and Reply URL in the pane. After adding the attributes, click on Save.
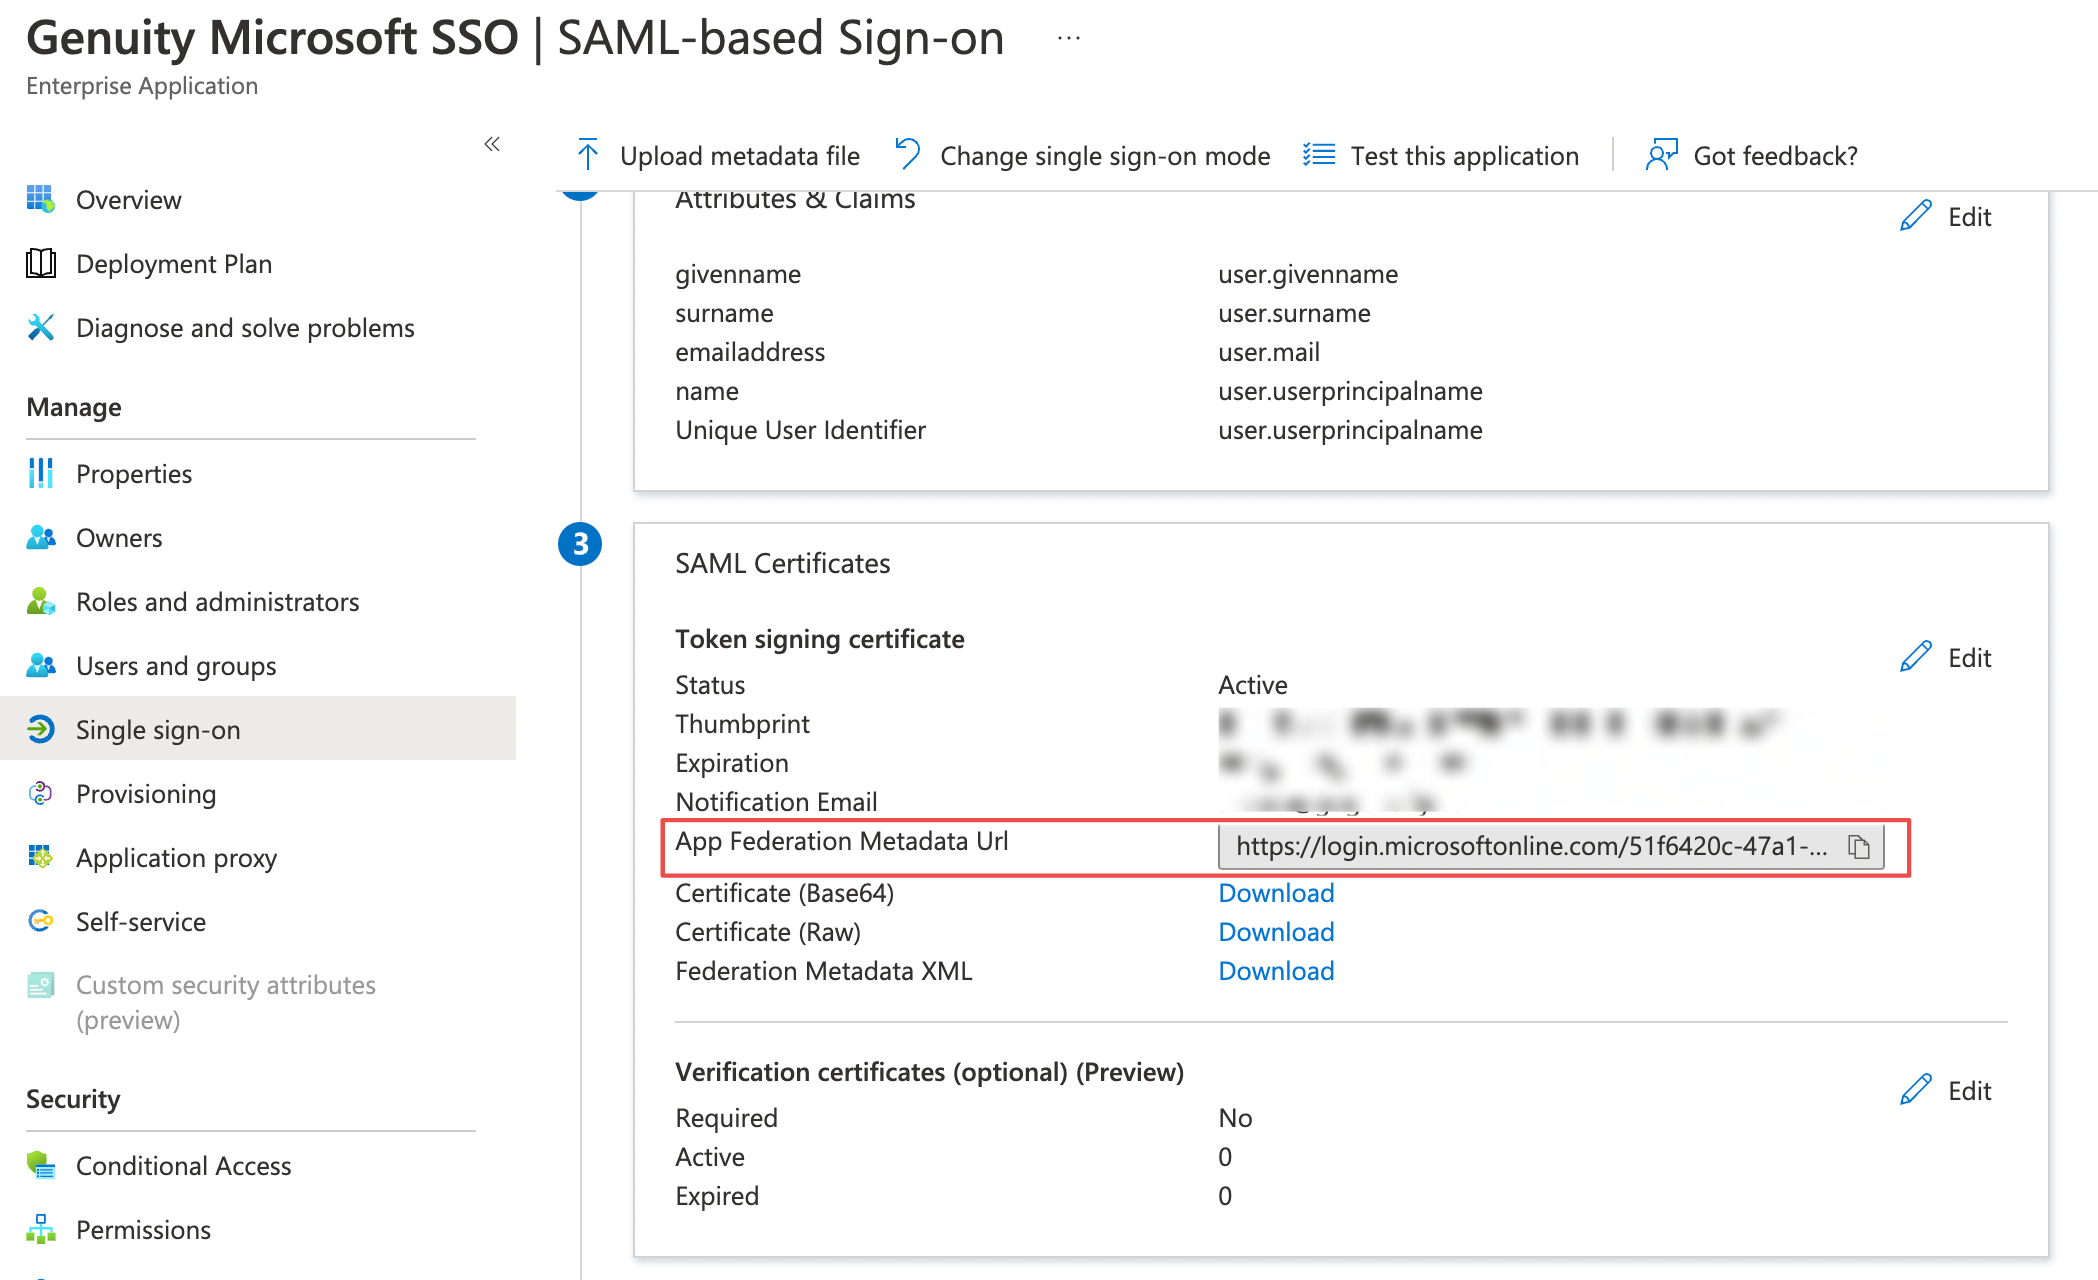
Step 11: Close the right pane. Scroll down to SAML Certificates section. In this section, copy the App Federation Metadata Url.
Step 12: Choose Users and groups in left pane and click on Add user/group from top bar.
.png)
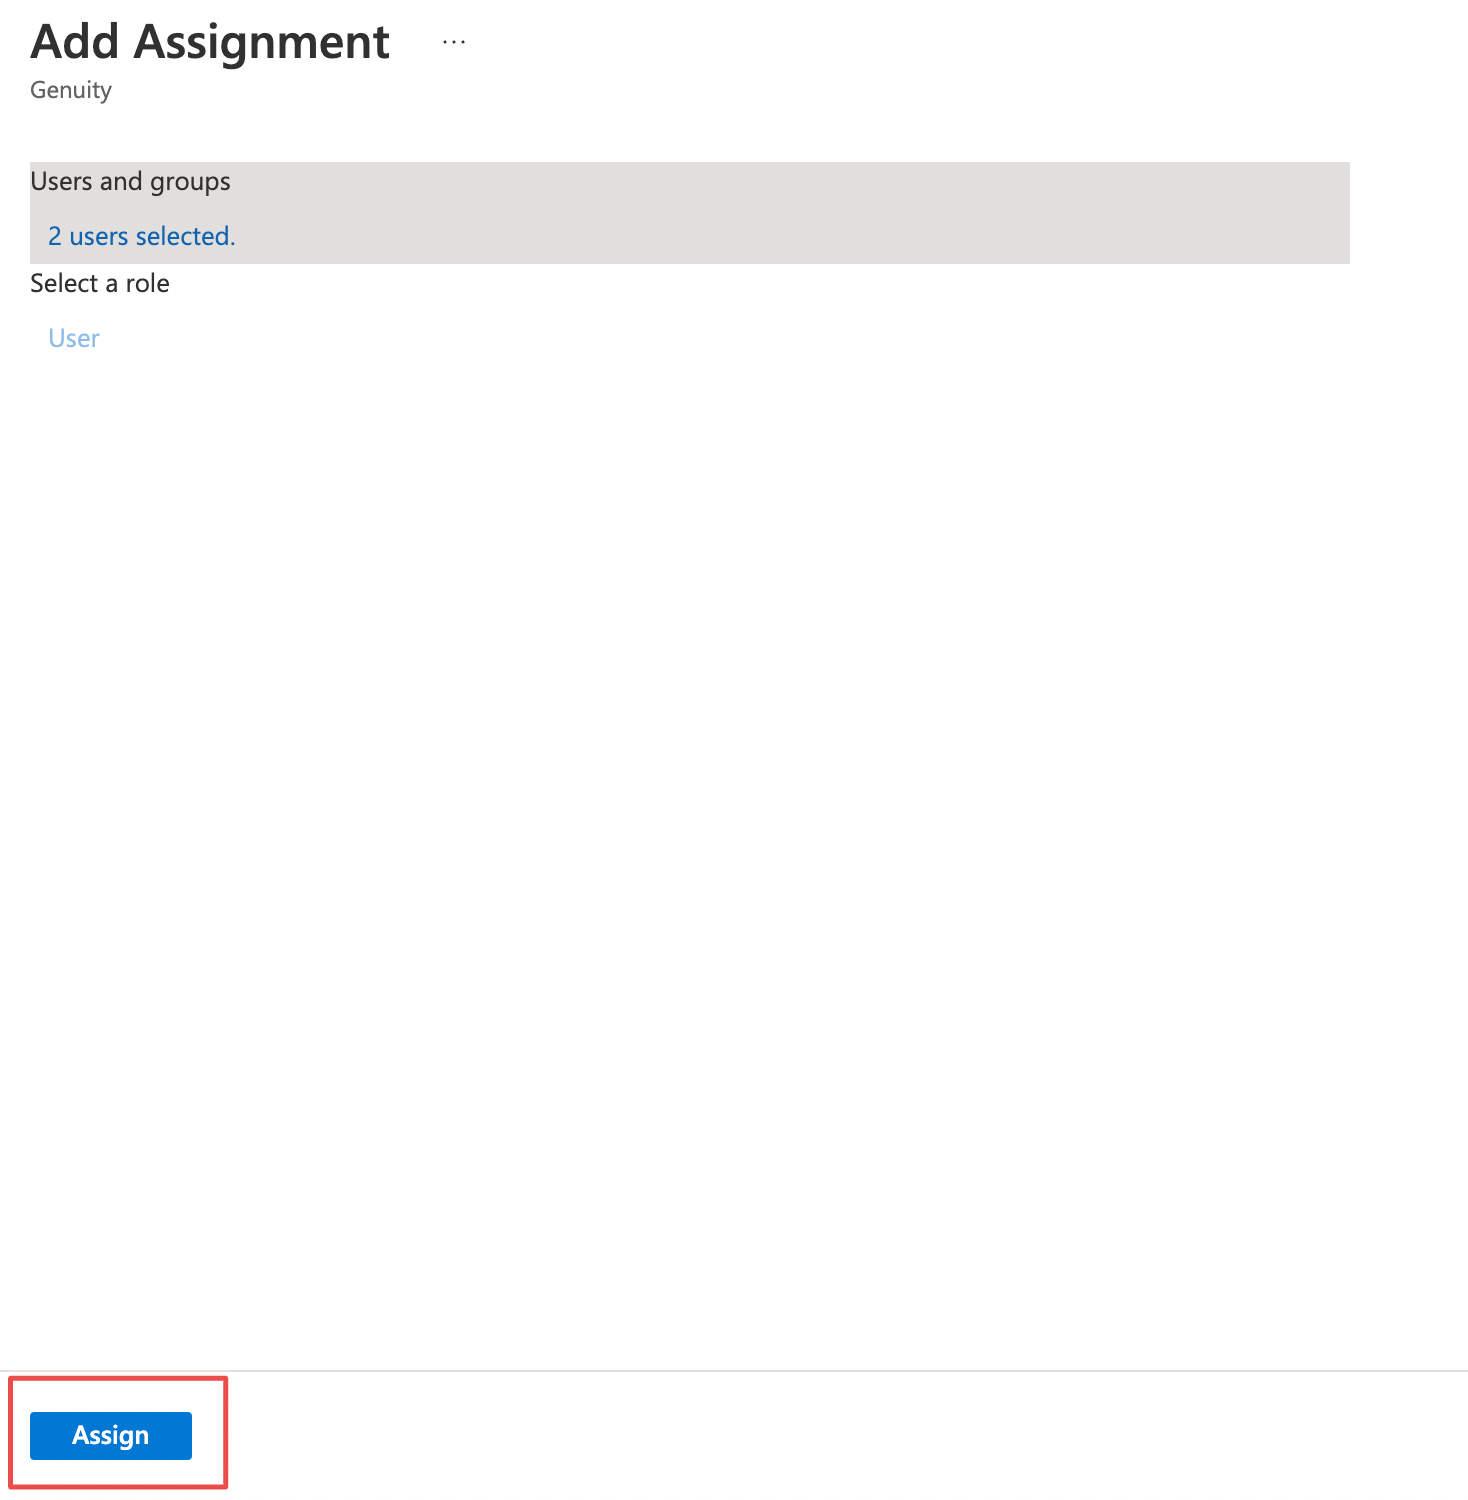
Step 13: Click on Users and groups. A right pane will be opened. Search for the users you want to give access to this application. After selecting all the users, click on Select button at the bottom of pane.
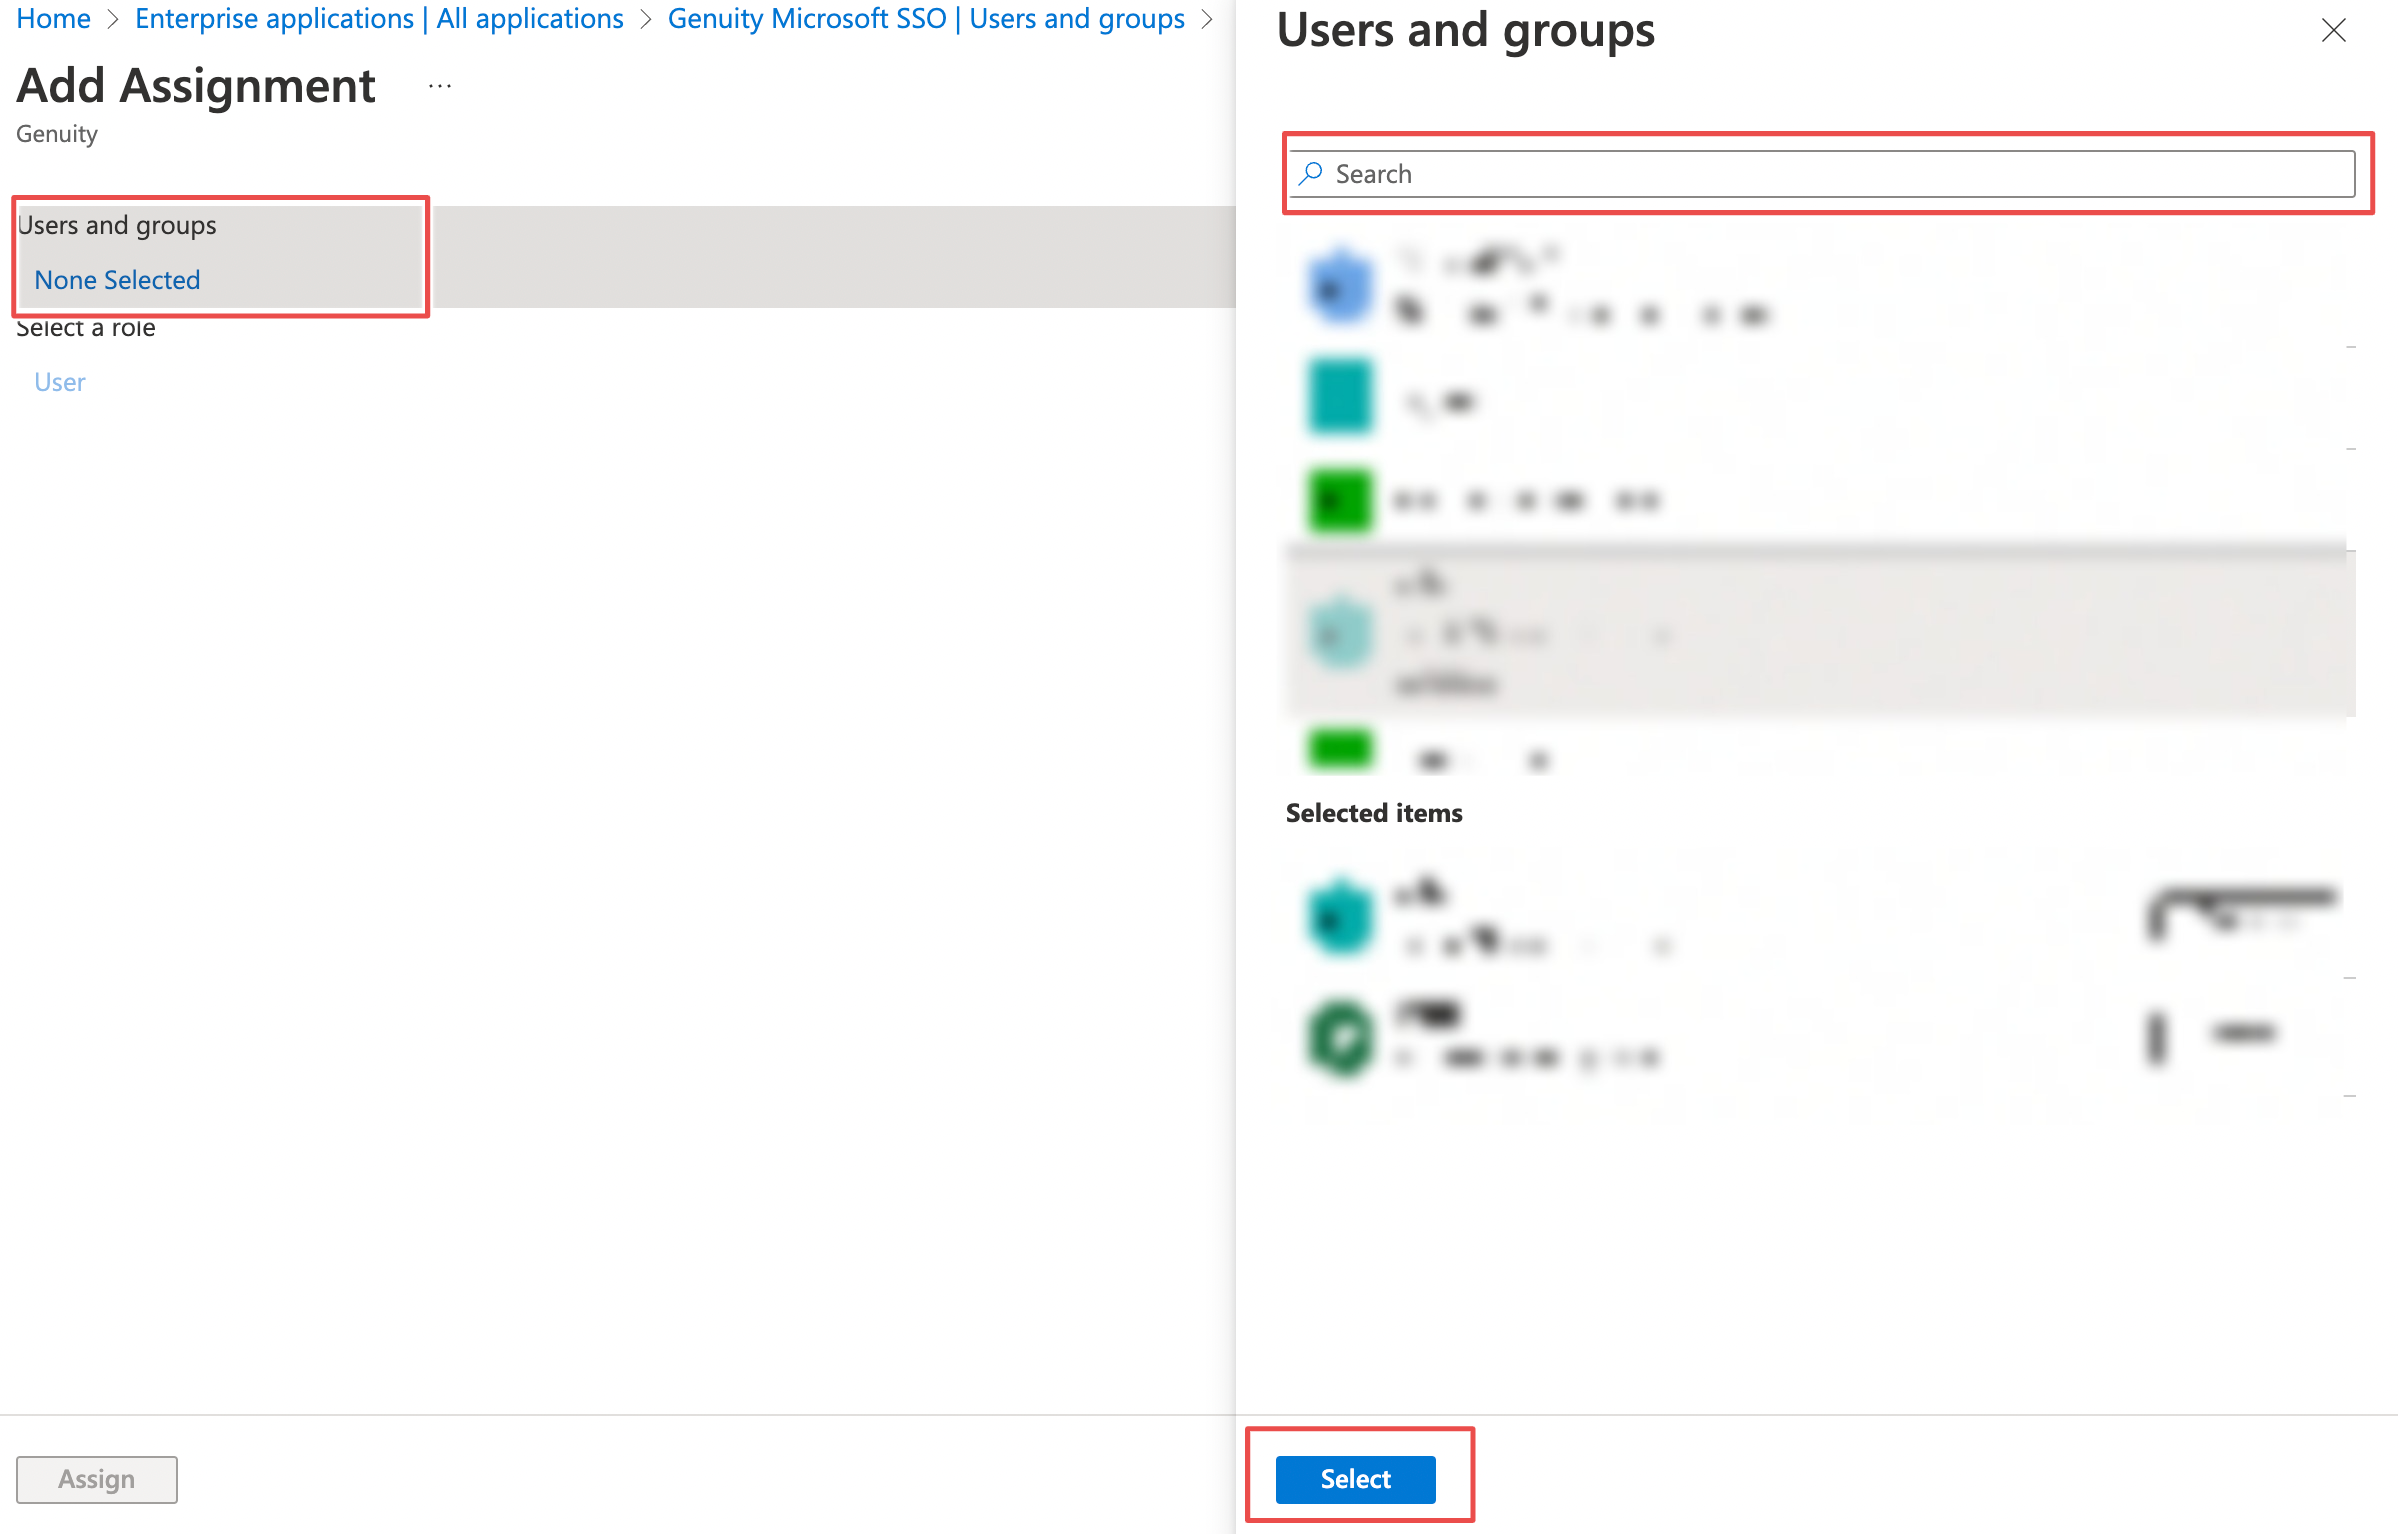
Step 14: Click on Assign button at the bottom of page.
Step 15: Mail to support@gogenuity.com along with the following information.
- Metadata URL (copied from step 11)
- Company Subdomain
- To login with microsoft after it is enabled, visit the following URL: https://YOUR_COMPANY_SUBDOMAIN.gogenuity.com.