Transactions come into Genuity automatically through your synced accounts, manual entry or importing data through templates.
Adding Transactions from a Synced Account
When you sync an account, Genuity pulls in your transactions. You'll see them in the Transactions tab. Genuity does its best to link your transactions with a list of pre-determined vendors.
Recognized
Recognized and linked transactions will be found in the Recognized tab, which means they're automatically added.
Needs Confirmation
Transactions in the Needs Confirmation tab are transactions that we're fairly certain we've linked with the correct vendor but need to be reviewed before they can be added to the system.
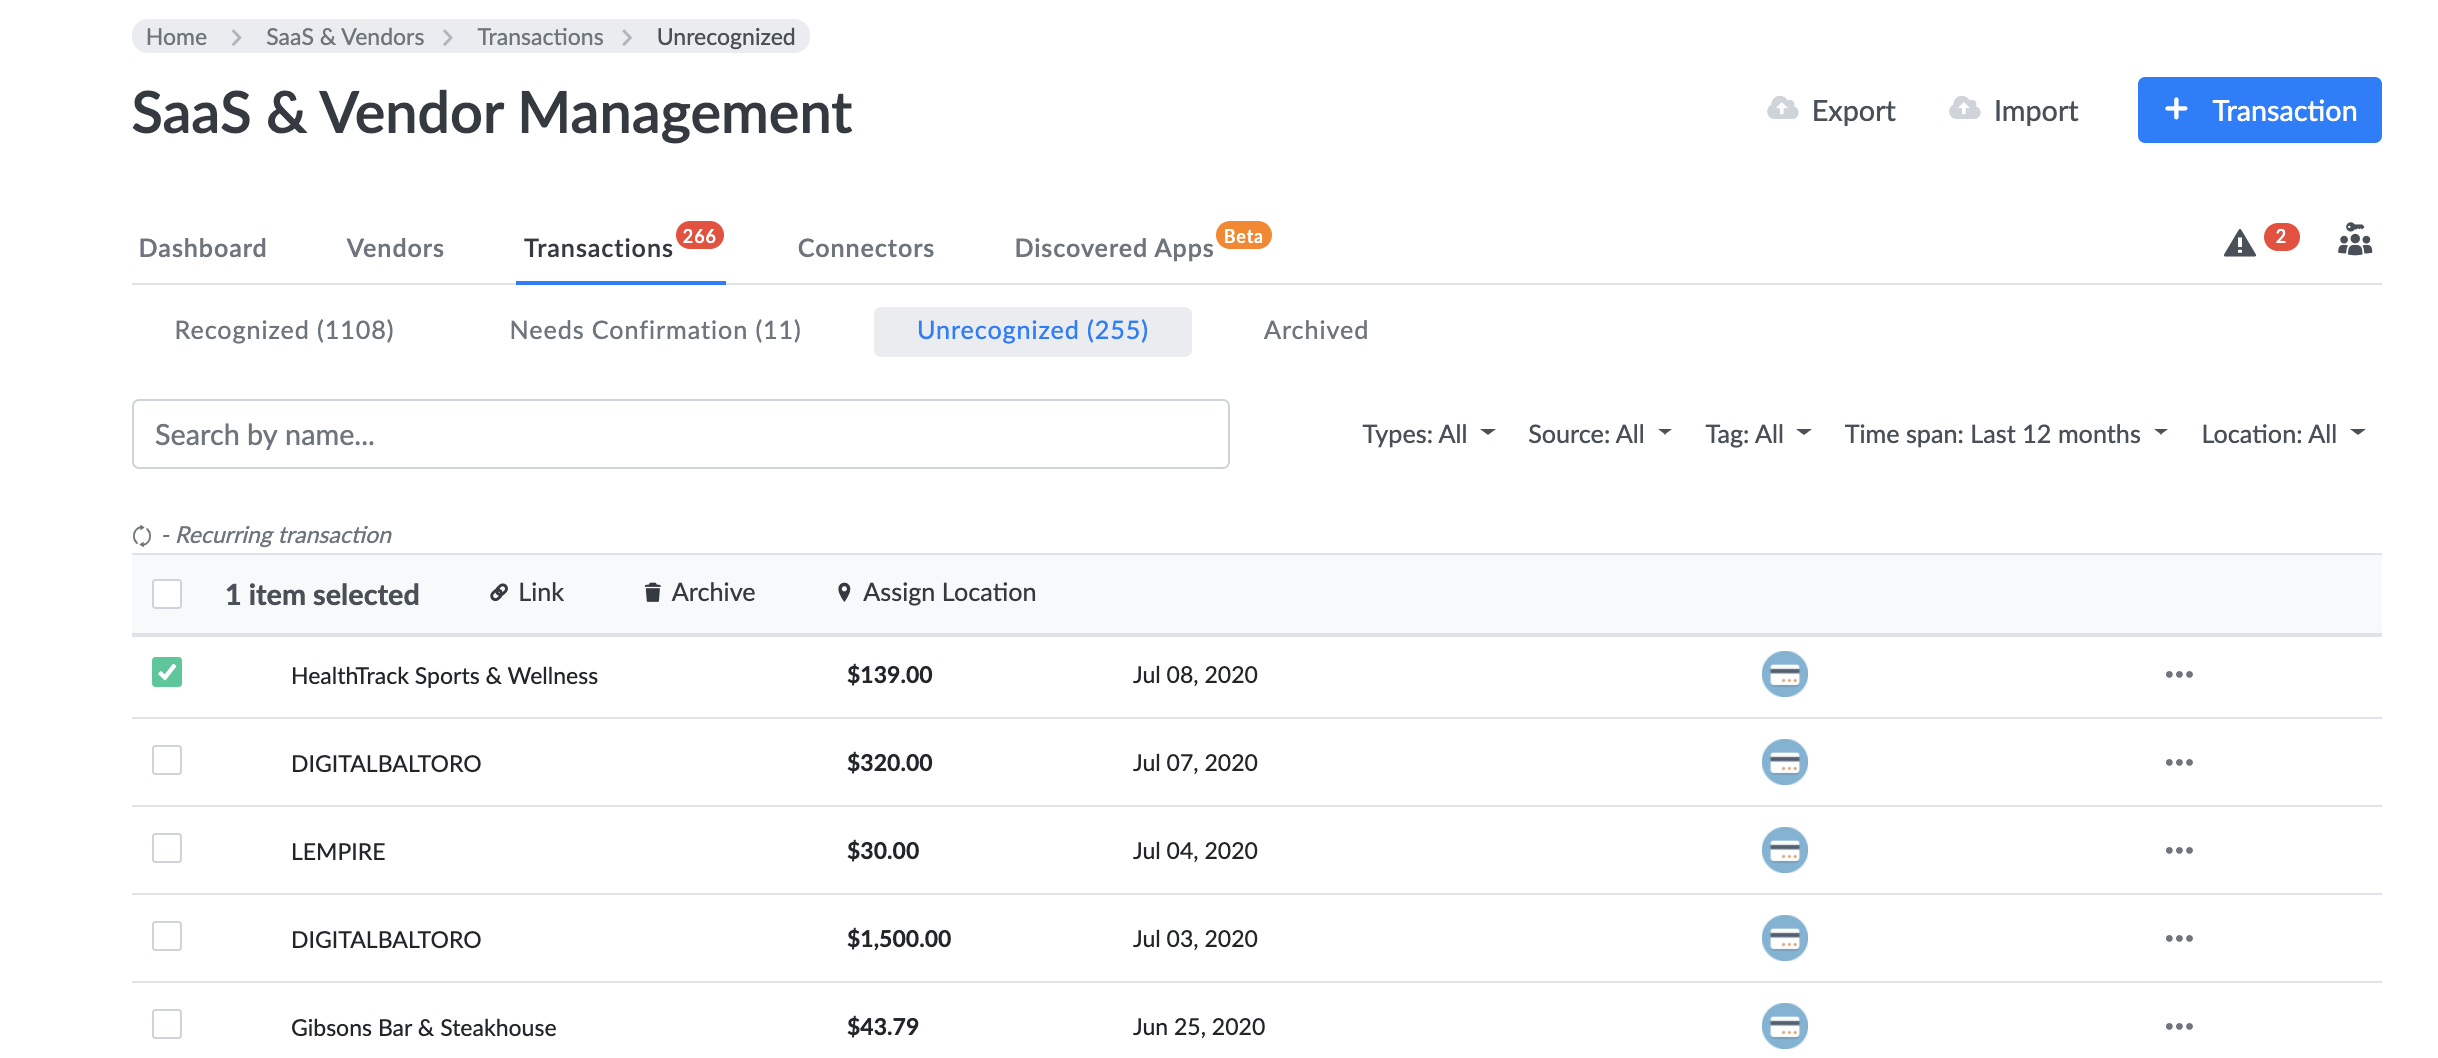
Unrecognized
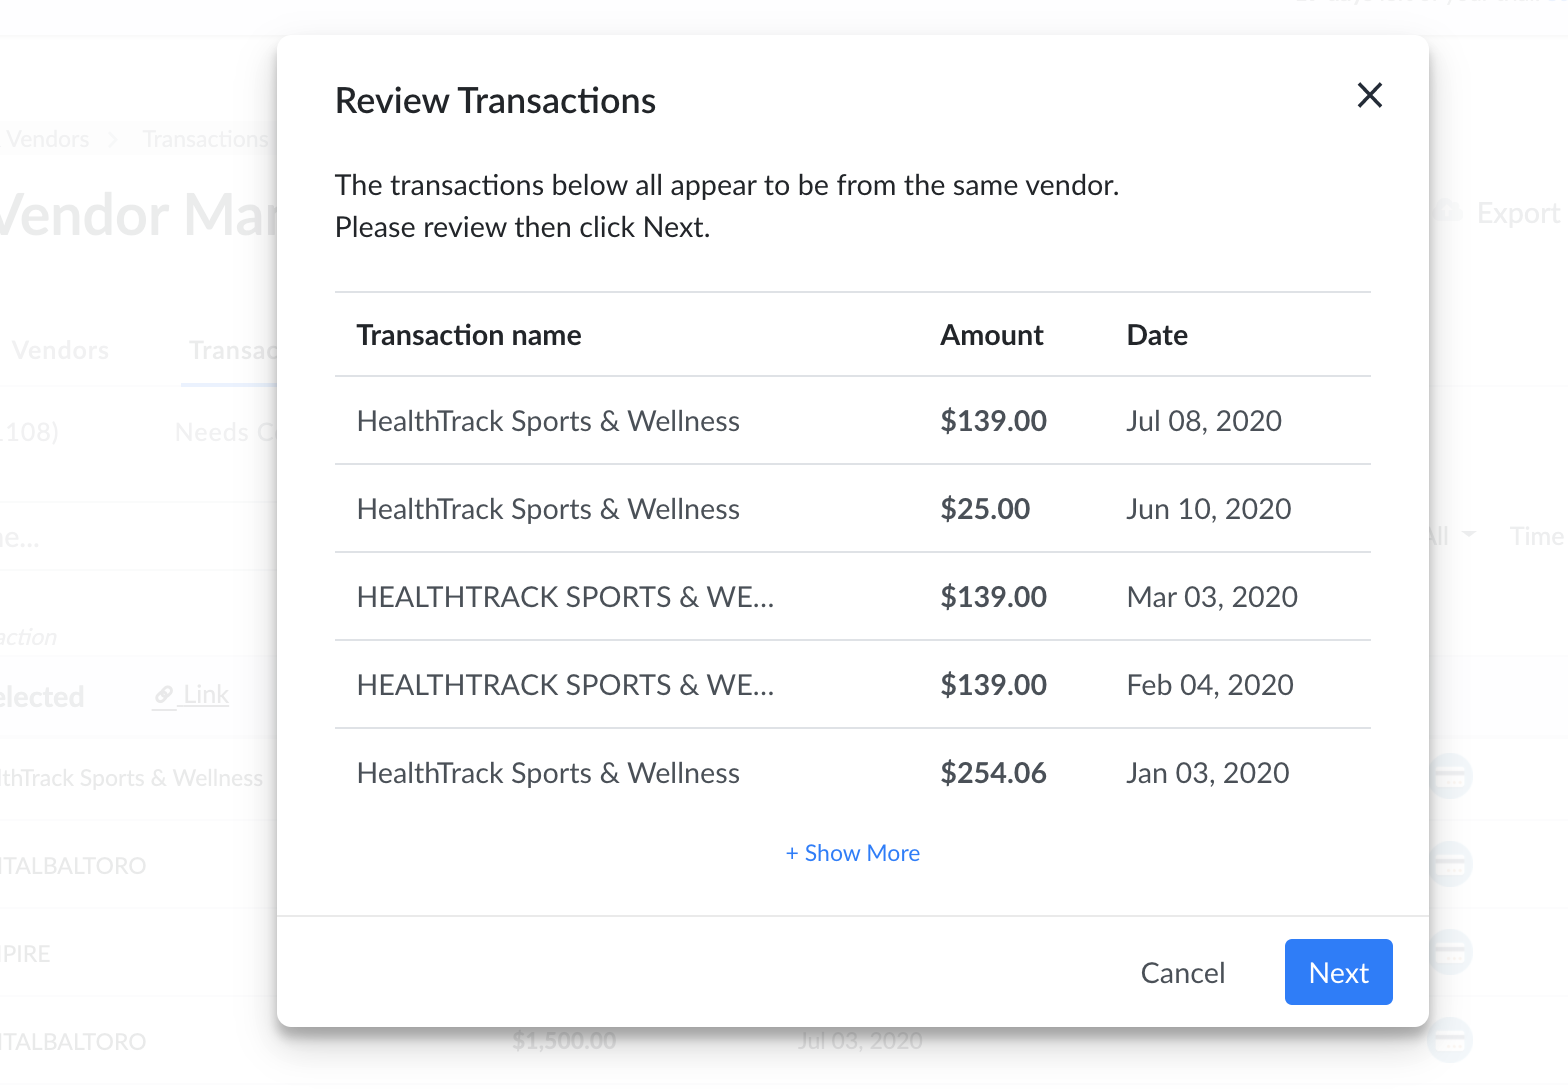
Transactions that are unrecognized need to be linked to a vendor. Genuity makes this easy by grouping similar transactions together to be linked at the same time. Once you link transactions to one vendor, all future transactions from that vendor will be recognized and automatically linked.
Manually adding a transaction
To manually add a transaction,
- Login to Genuity as a user or administrator. You will need to have edit permissions for the Vendors module.
- Navigate to the Vendors → Transactions tab.
- Click the Transaction button in the top right corner.
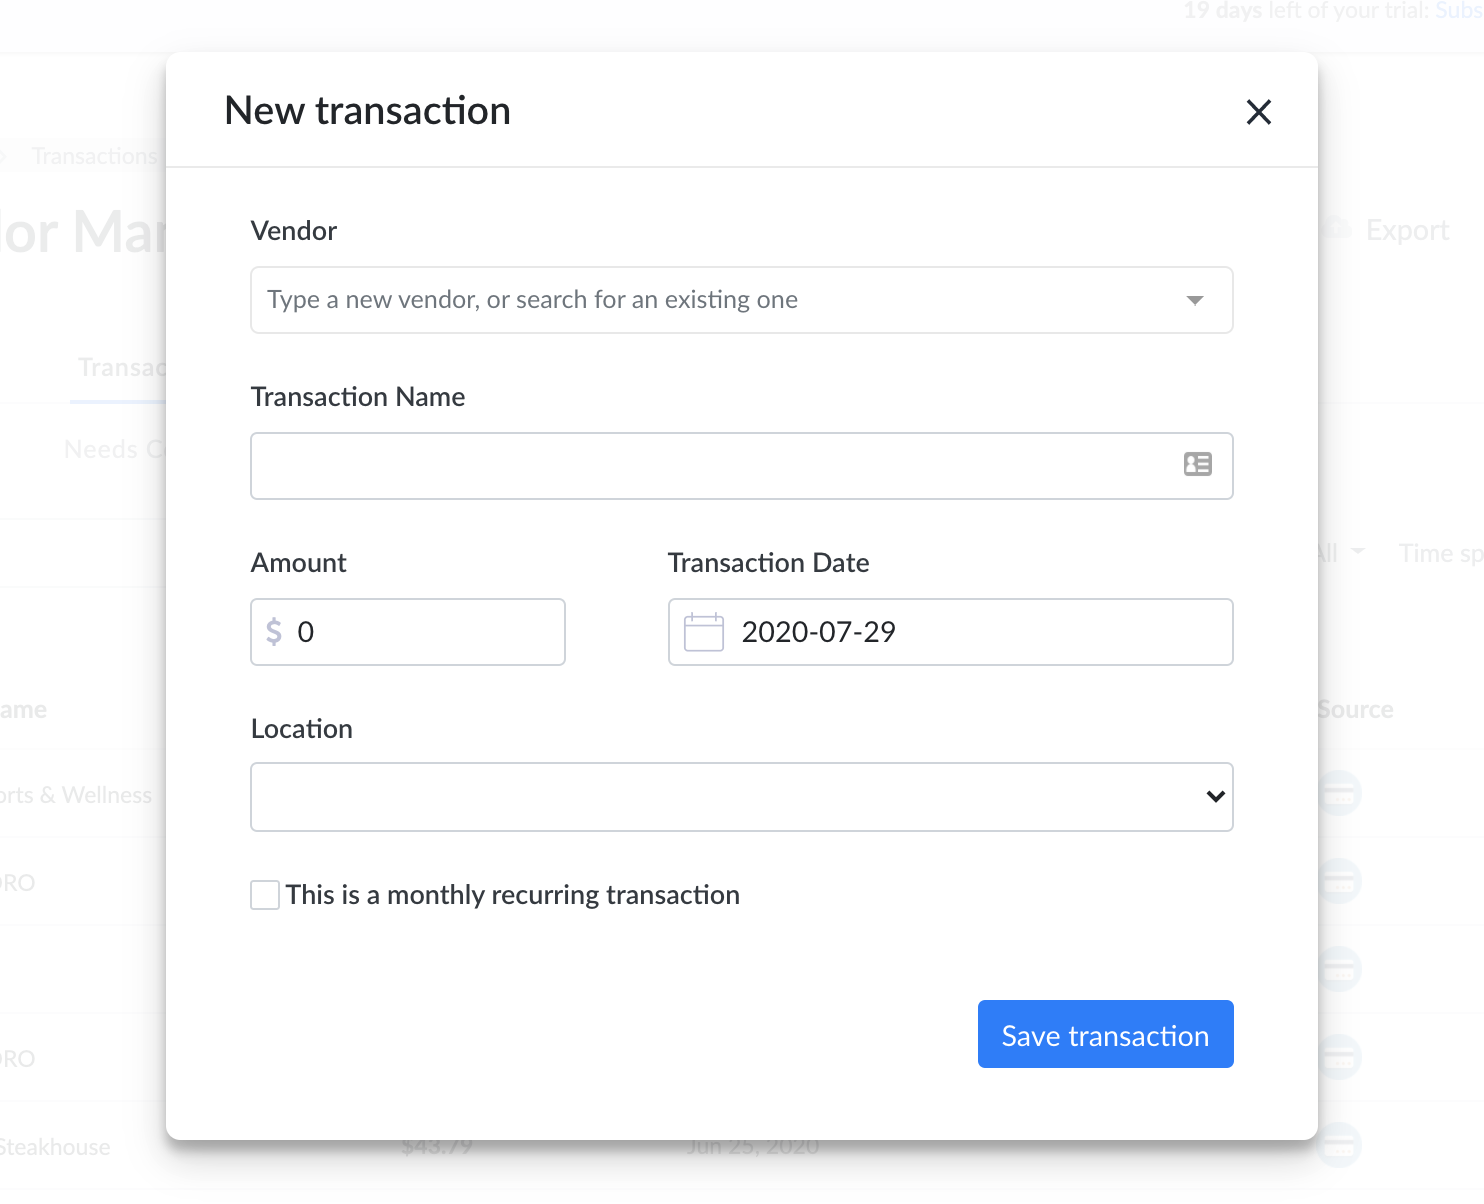
- Link or create a vendor for this transaction.
- Fill in the additional information: Amount and Transaction Date
- Click on the Save Transaction button to finish adding the transaction.