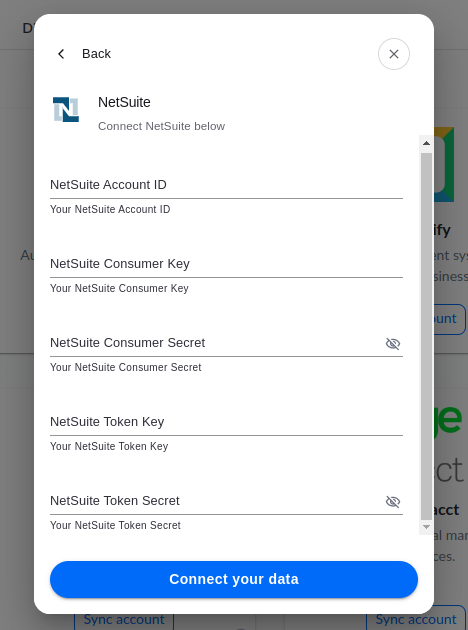
Genuity makes it simple to connect all of your NetSuite vendors and transactions.
For this you need to first configure NetSuite’s Token Based Authentication.
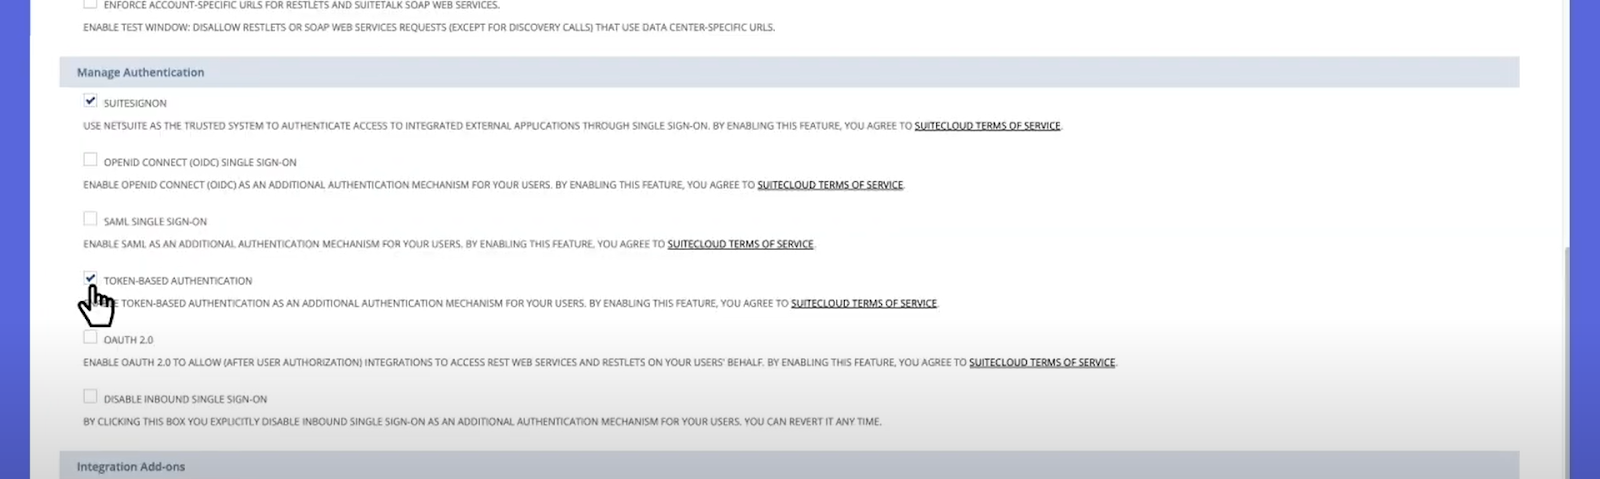
Step 1: Enable Token-Based Authentication
Token Based Authentication in your NetSuite Account is incredibly easy to set up and can be used in your Genuity NetSuite connectors.
For this, you will need an administrator account to set up token-based authentication. To do so, follow the steps given below:
- Login to NetSuite App
- Go to your Setup > Company > Enable Features > Suite Cloud > Manage Authentication
- Click on Enable Token-Based Authentication
Step 2: Create Integration record
- Go to menu Setup > Integrations > Manage Integrations
- Click on New button
- Check the following options:
- Token-Based Authentication option
- TBA: ISSUETOKEN ENDPOINT
- User Credentials

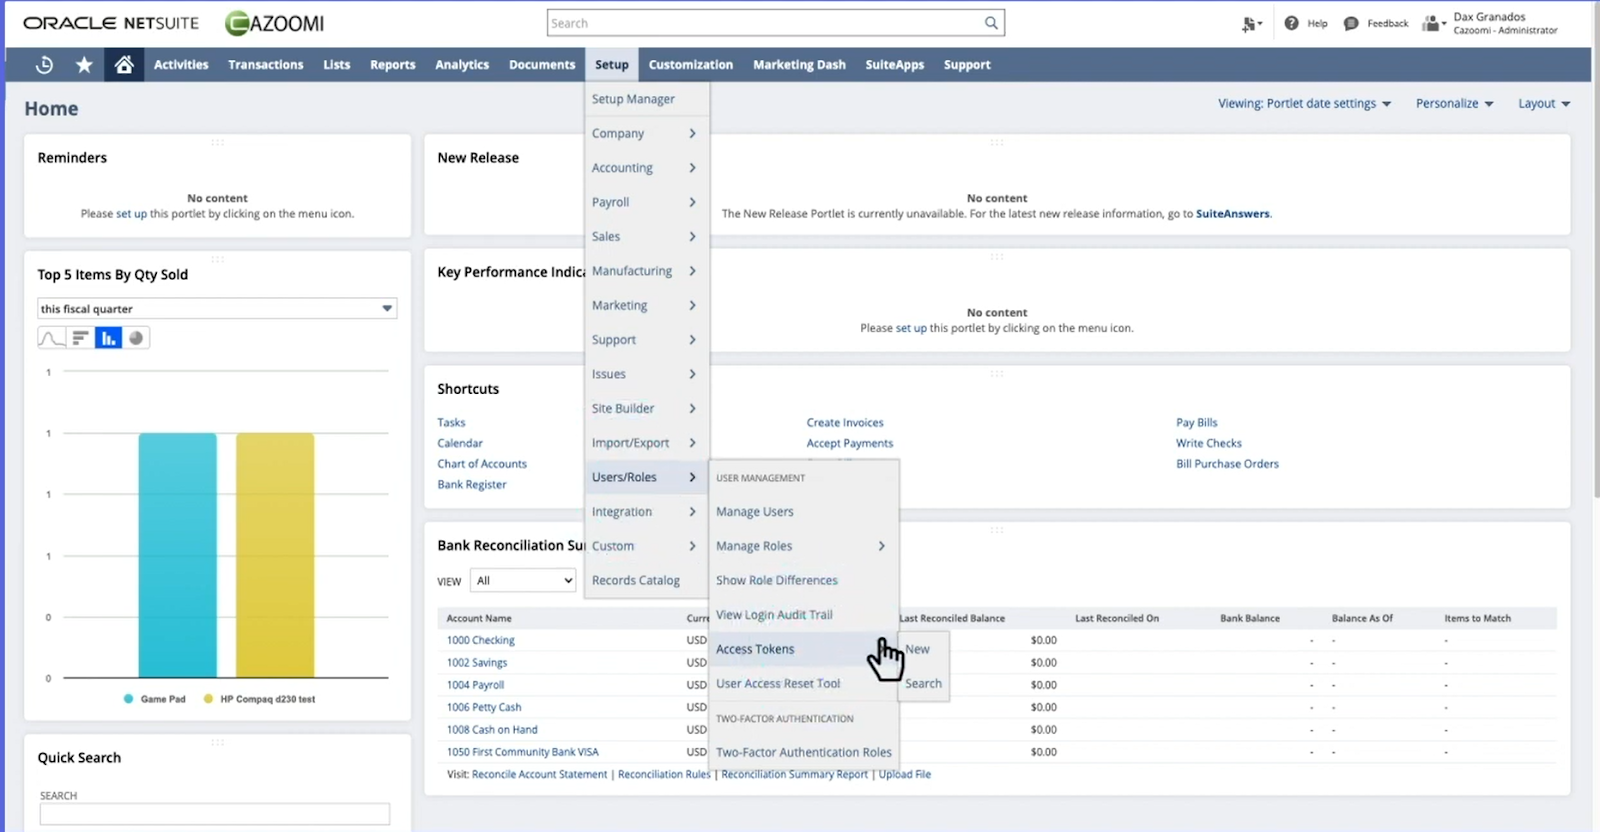
Step 3: Create a Role and Assign it to a User
- Go to Setup > Users/Roles > Manage Roles > New
- Create a new role with the following permissions:
- Setup (all full)
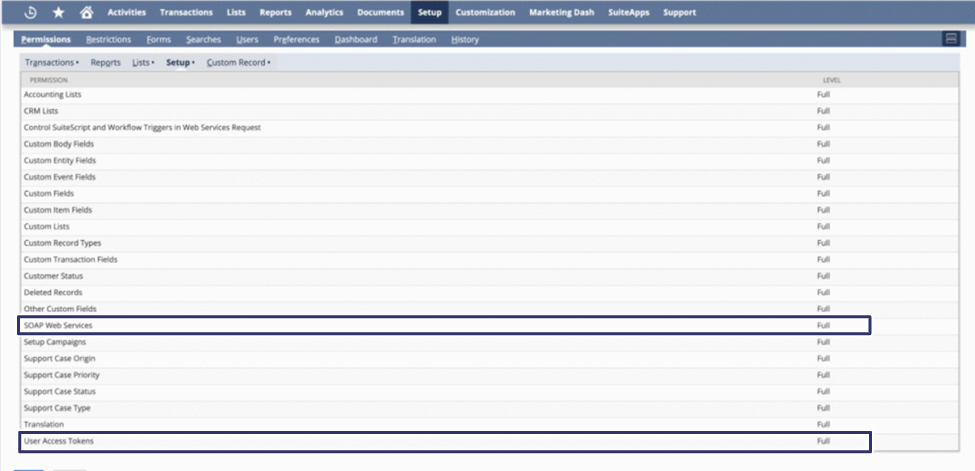
- User Access Token
- SOAP Web Services
- Log in using Access Tokens
- Integration Application
- REST Web Services
- Access Token Management
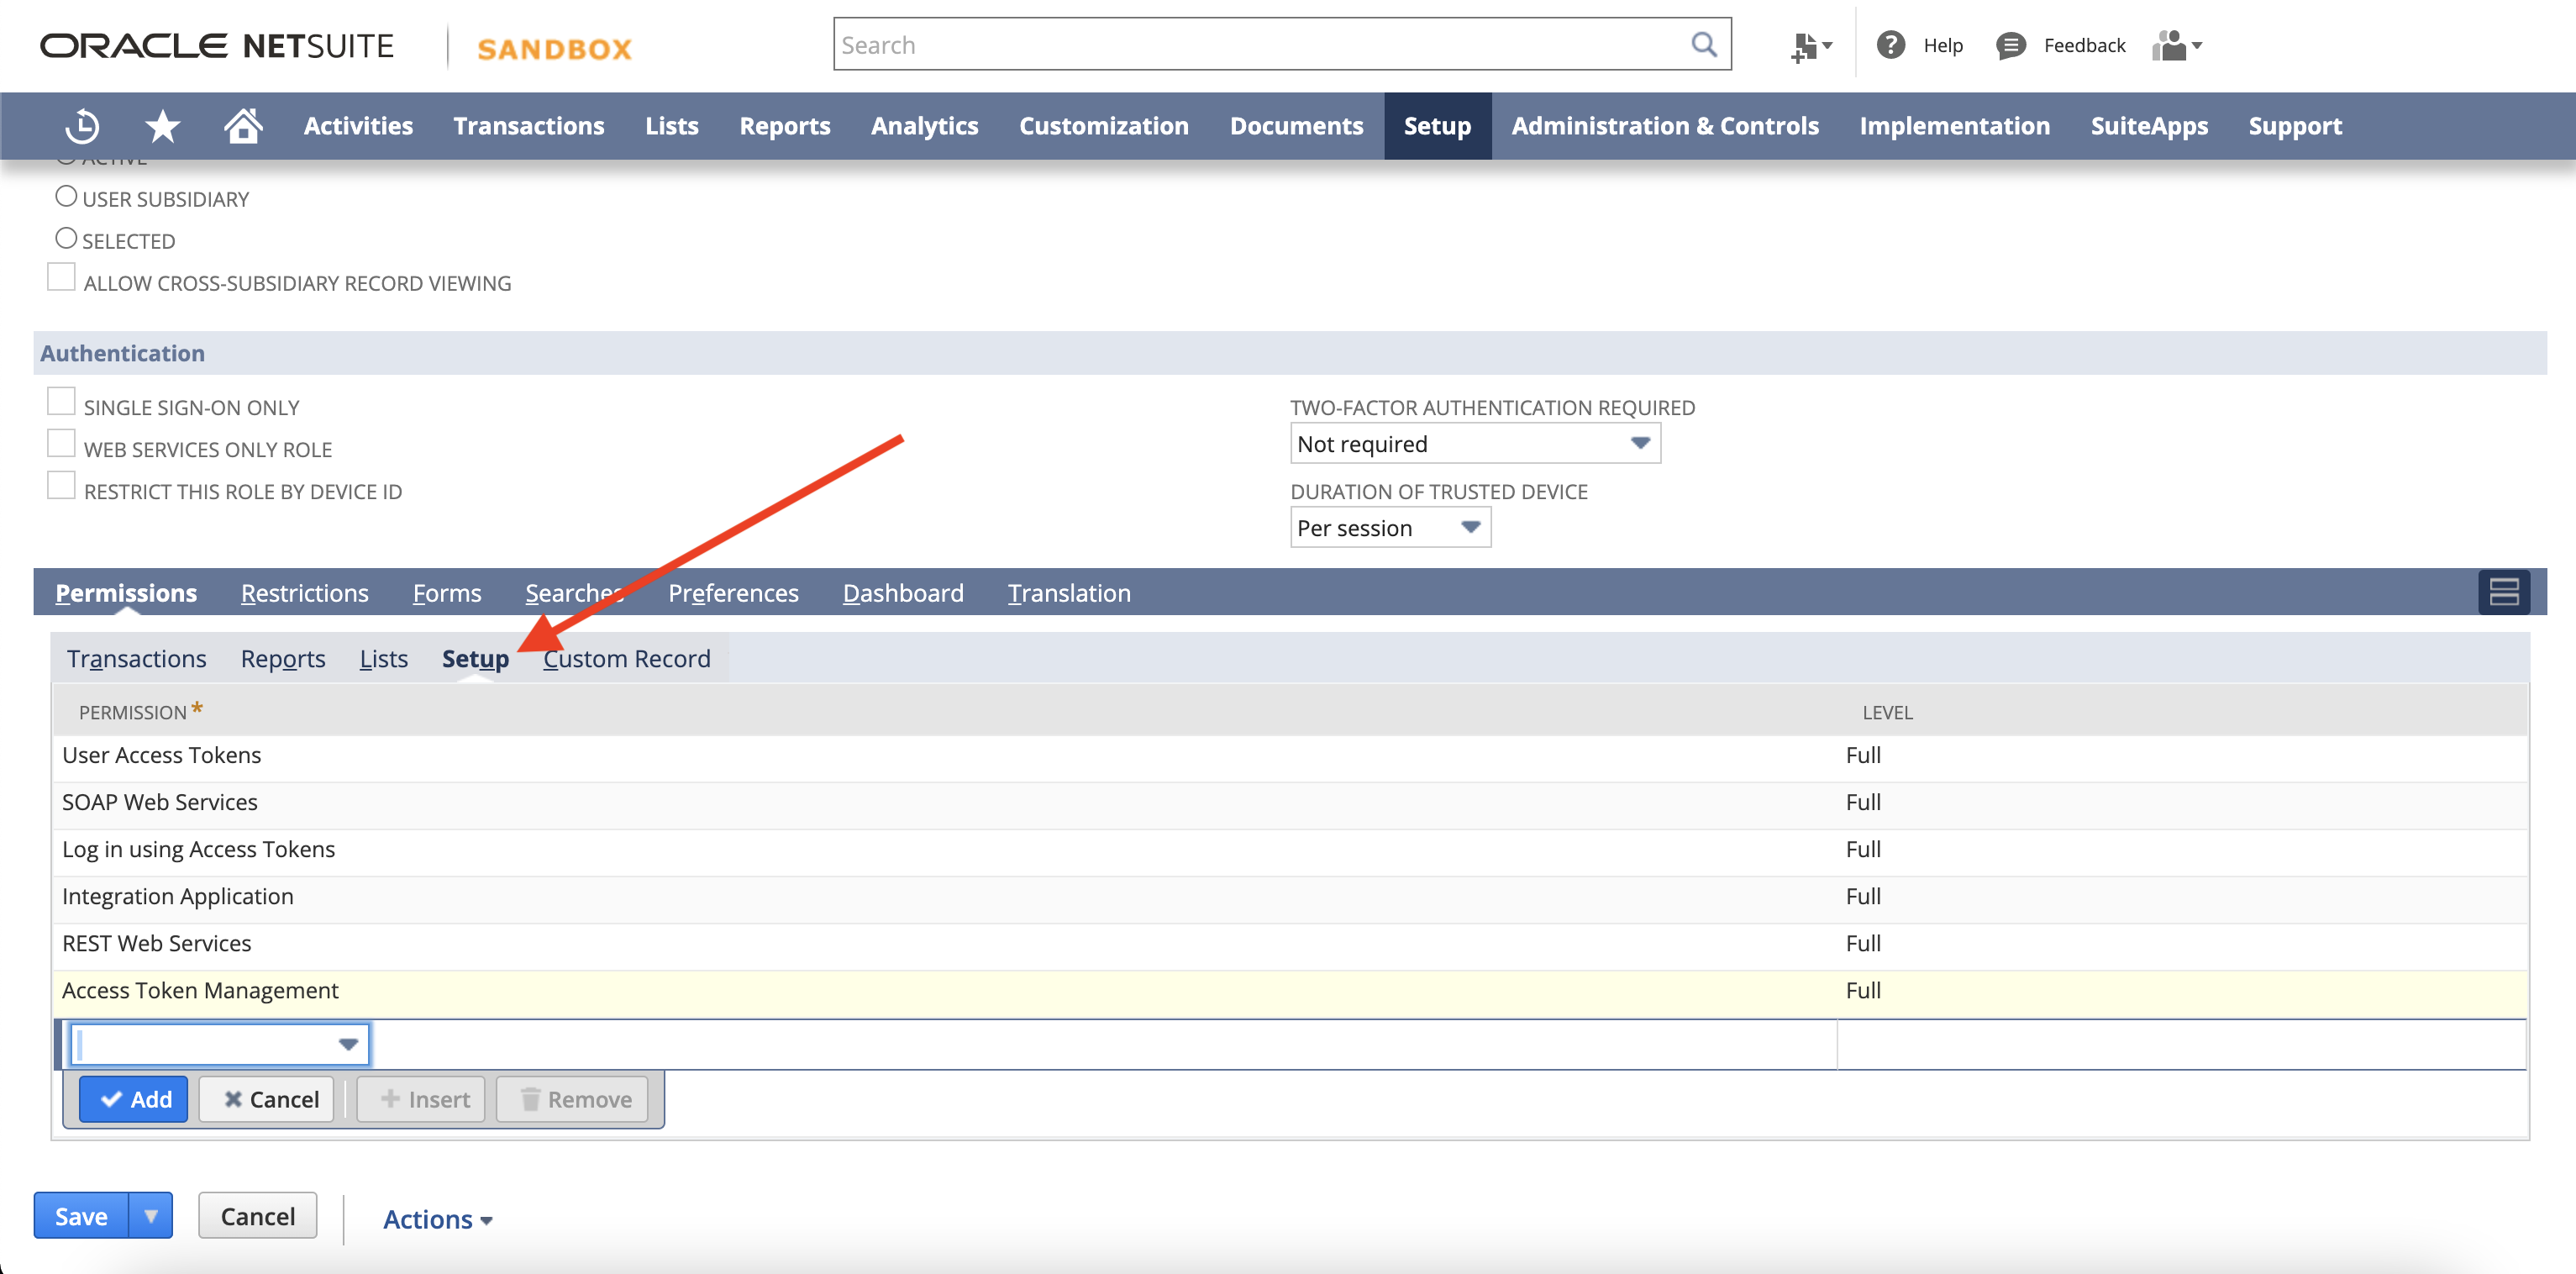
3. The role must have "User Access Tokens" permission for integration using token-based authentication.
4. Assign the role to the desired user that will be used for integration.
- Go to Lists >Employees > Employees > Edit user > Access tab > Roles sub-tab.
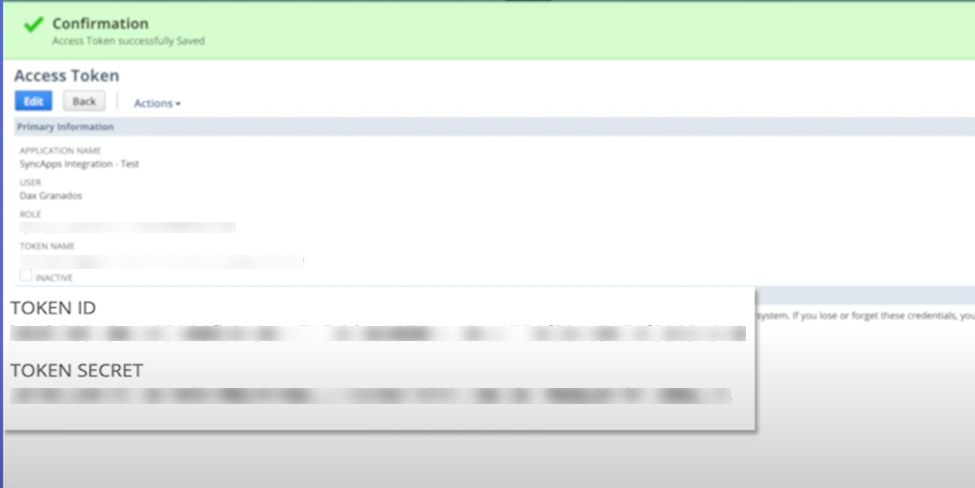
Step 4: Create an Access Token for the Integration Record, User, and Role
- Go to Setup > Users/Roles > Access Tokens > New
2. Select the Integration record, User, and Role created or referenced in the previous steps
3. The token ID and token secret will be displayed after tapping the save button.
Step 5: Grant the permissions to the desired role.
1. Navigate to Setup > Users/Roles > Manage Roles.
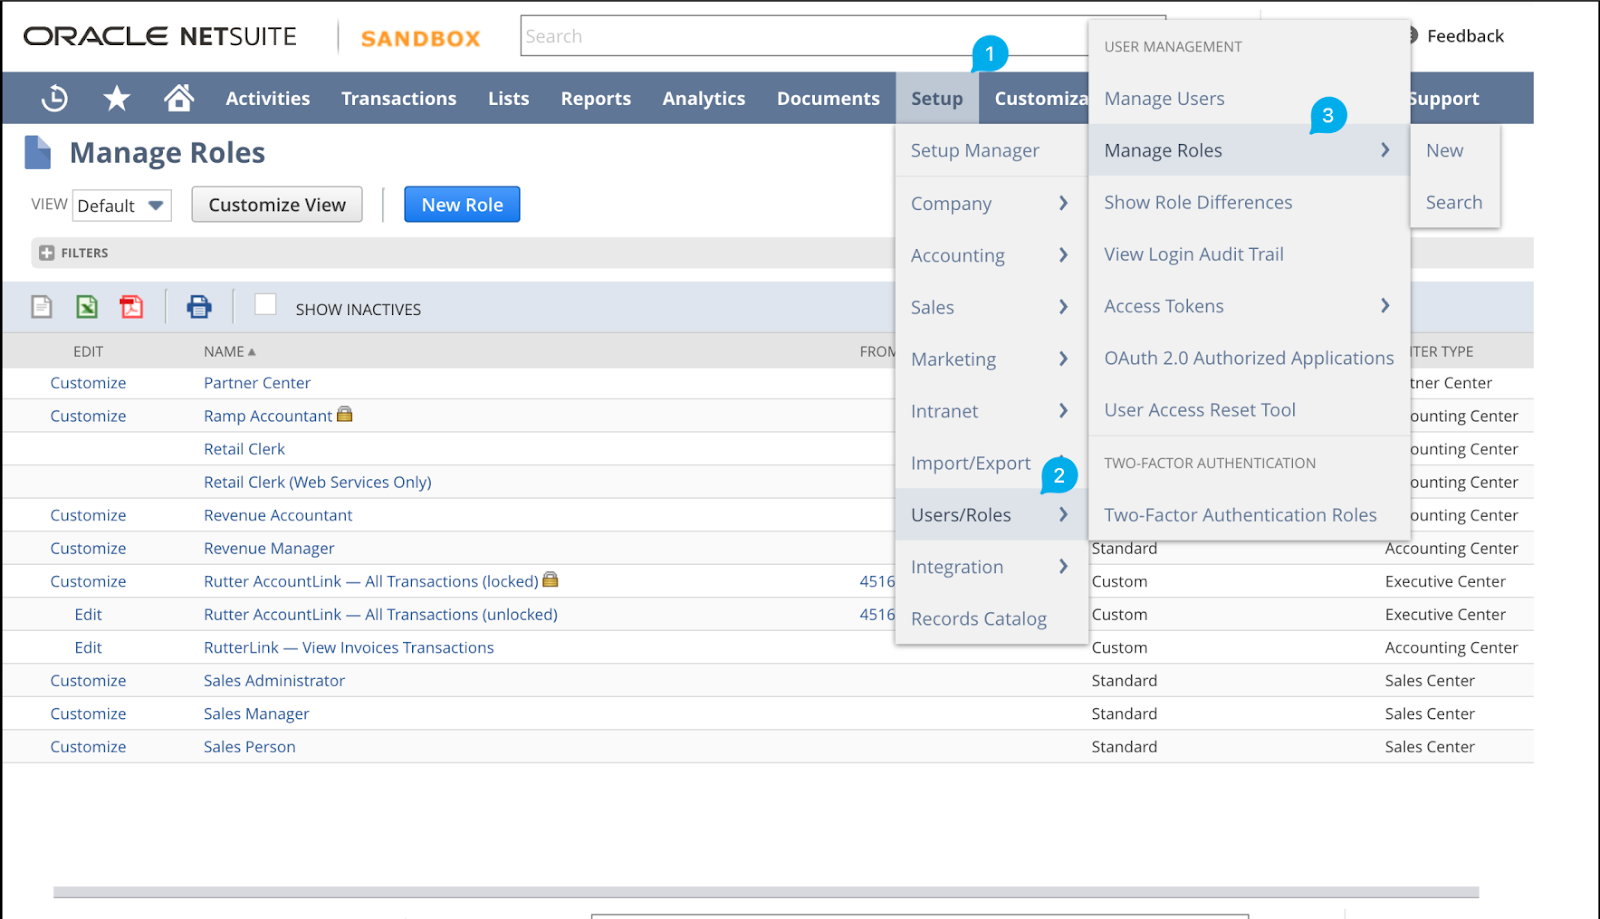
2. In the Roles list, select an existing role to modify and click on ‘Edit’.

3. Once you have selected the role, click on "Permissions" and navigate to Lists.
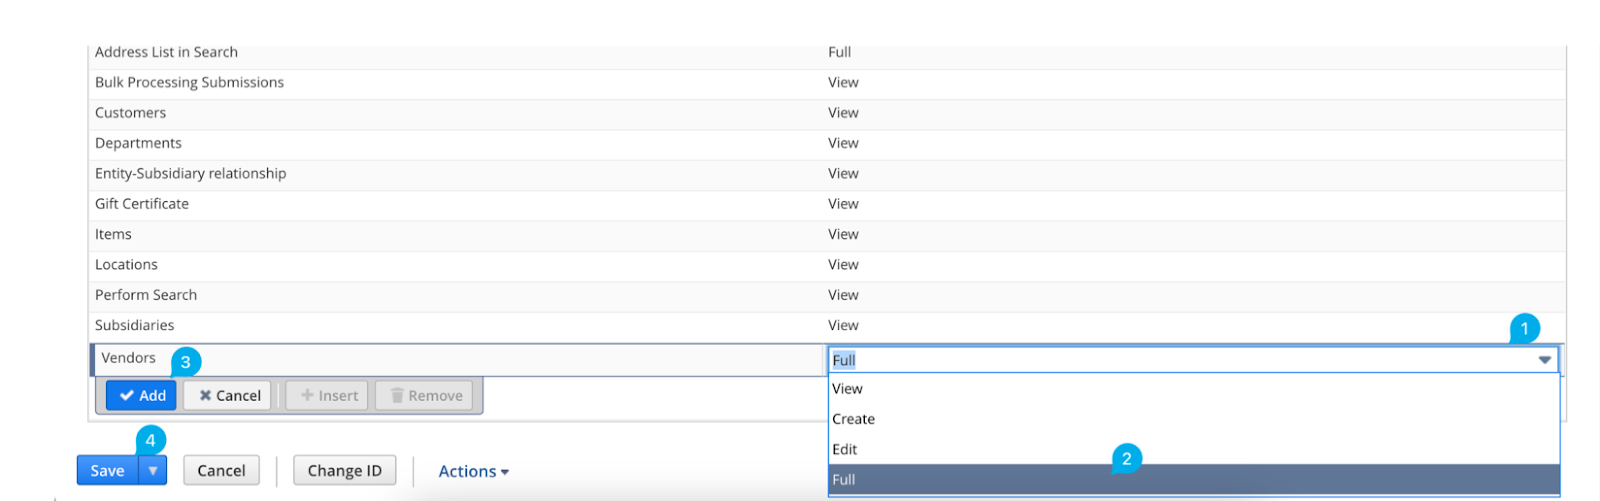
4. Under the “Lists” section, find and check the box next to “Vendors.”
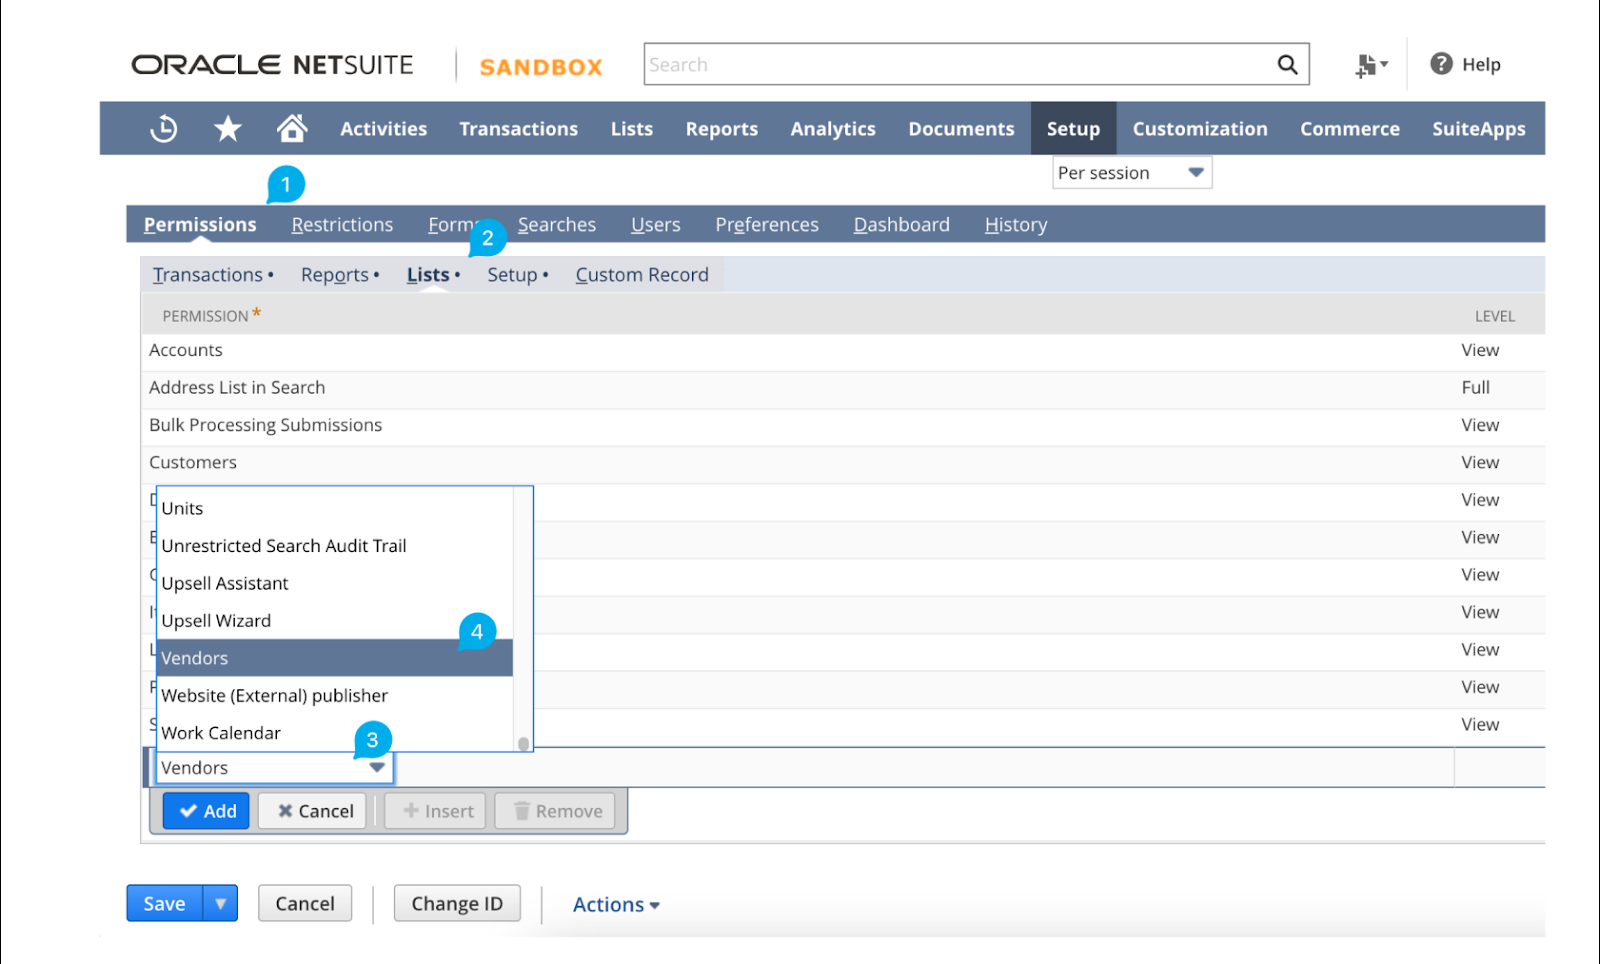
5. Expand the “Vendors” section and select full options.
6. Once you have selected the appropriate permissions, click the “Save” button to save the changes.
7. To authorize transactions, simply navigate to the "Transaction" tab and proceed to include bills with the "Full" option.

After completing the preceding steps, you may now connect to NetSuite using the Account ID, Consumer Key, Consumer Secret, Token Key, and Token Secret.