Instructions for integrating Kaseya
Step 1: Login to Kaseya portal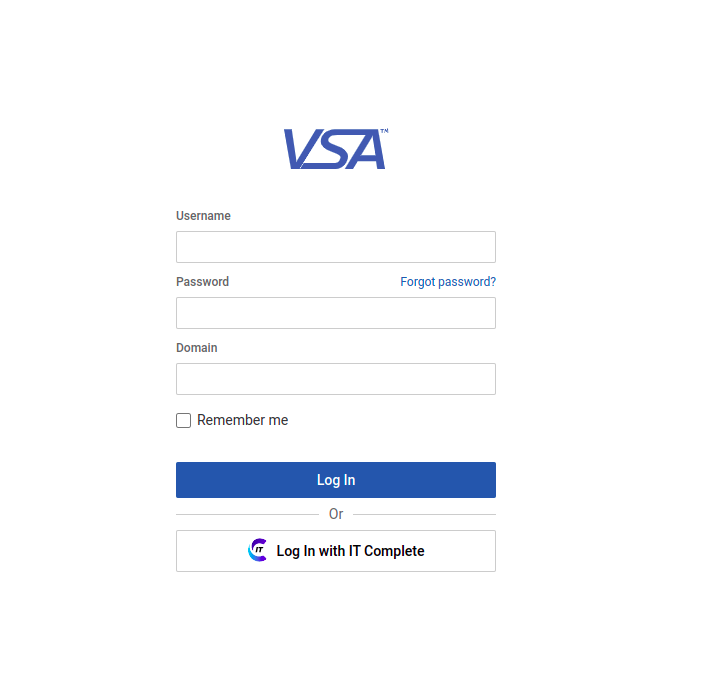
Step 2: In the navigation menu, select System > User Security > Users. Click New.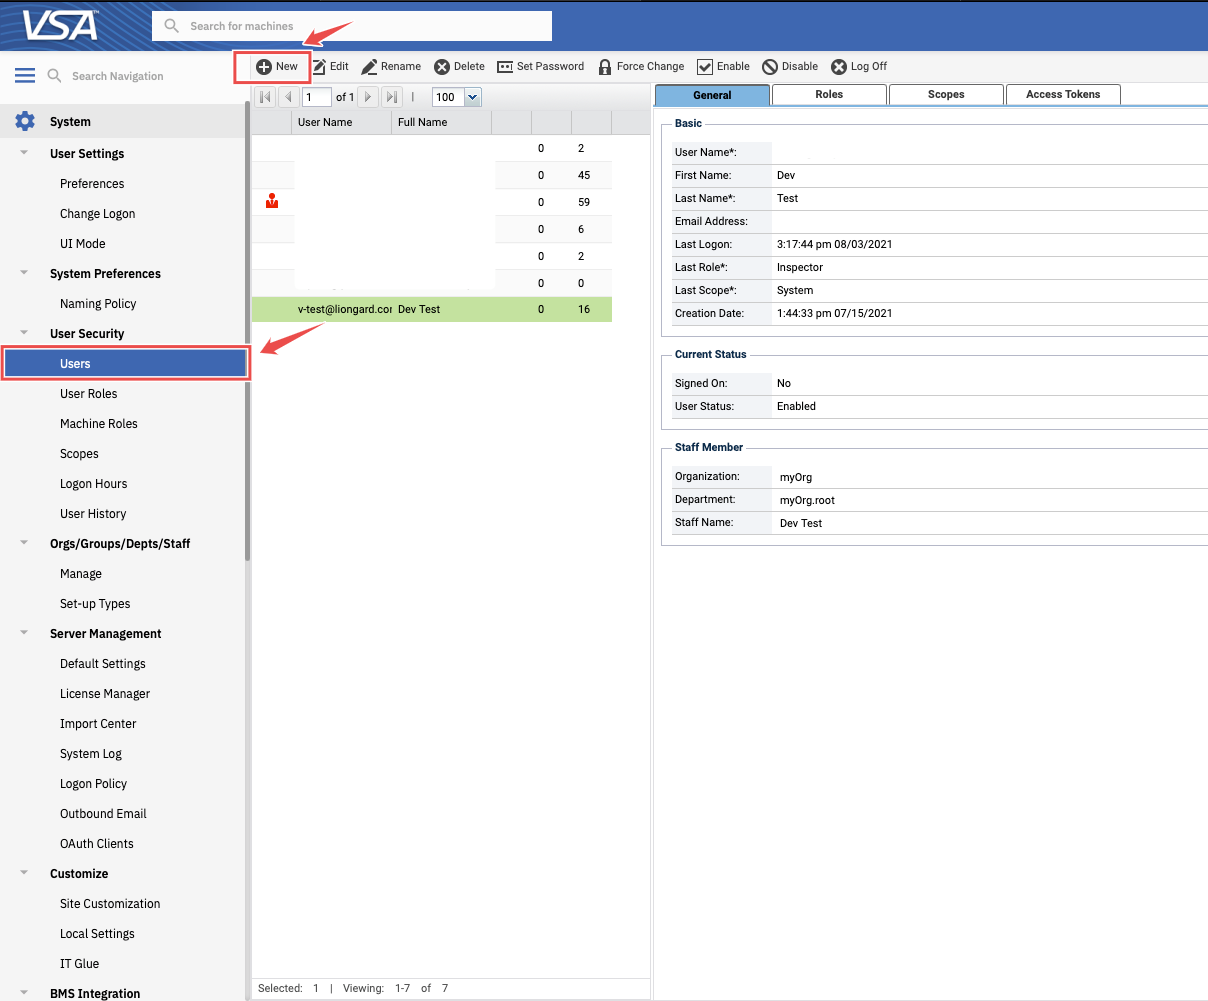
Step 3: Complete the fields, ensuring the fields highlighted below are completed as suggested. Click Save.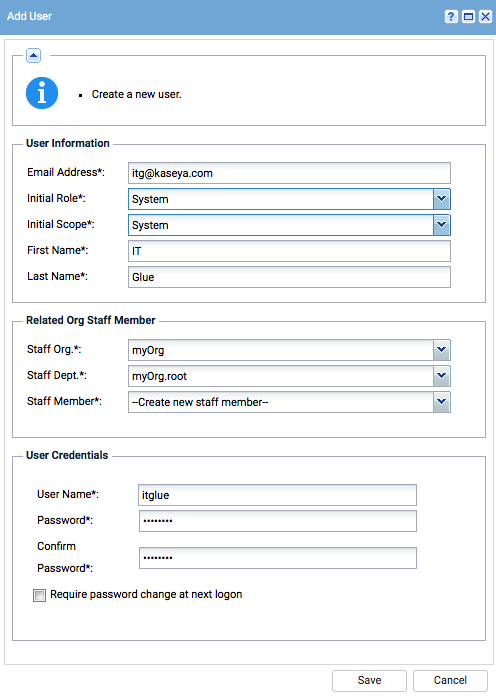
Step 4: Navigate to the Access Token tab and select New.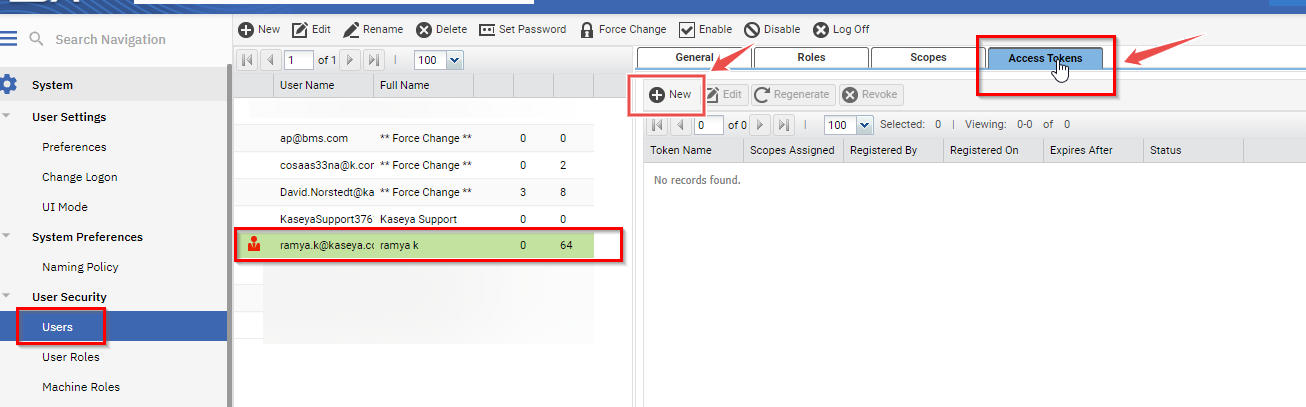
Step 5: Input a Token Name and leave the "Expires after the date" field blank to indicate no expiration date.
Step 6: Under Scopes Assigned select Rest API (Read, Write). Click Save.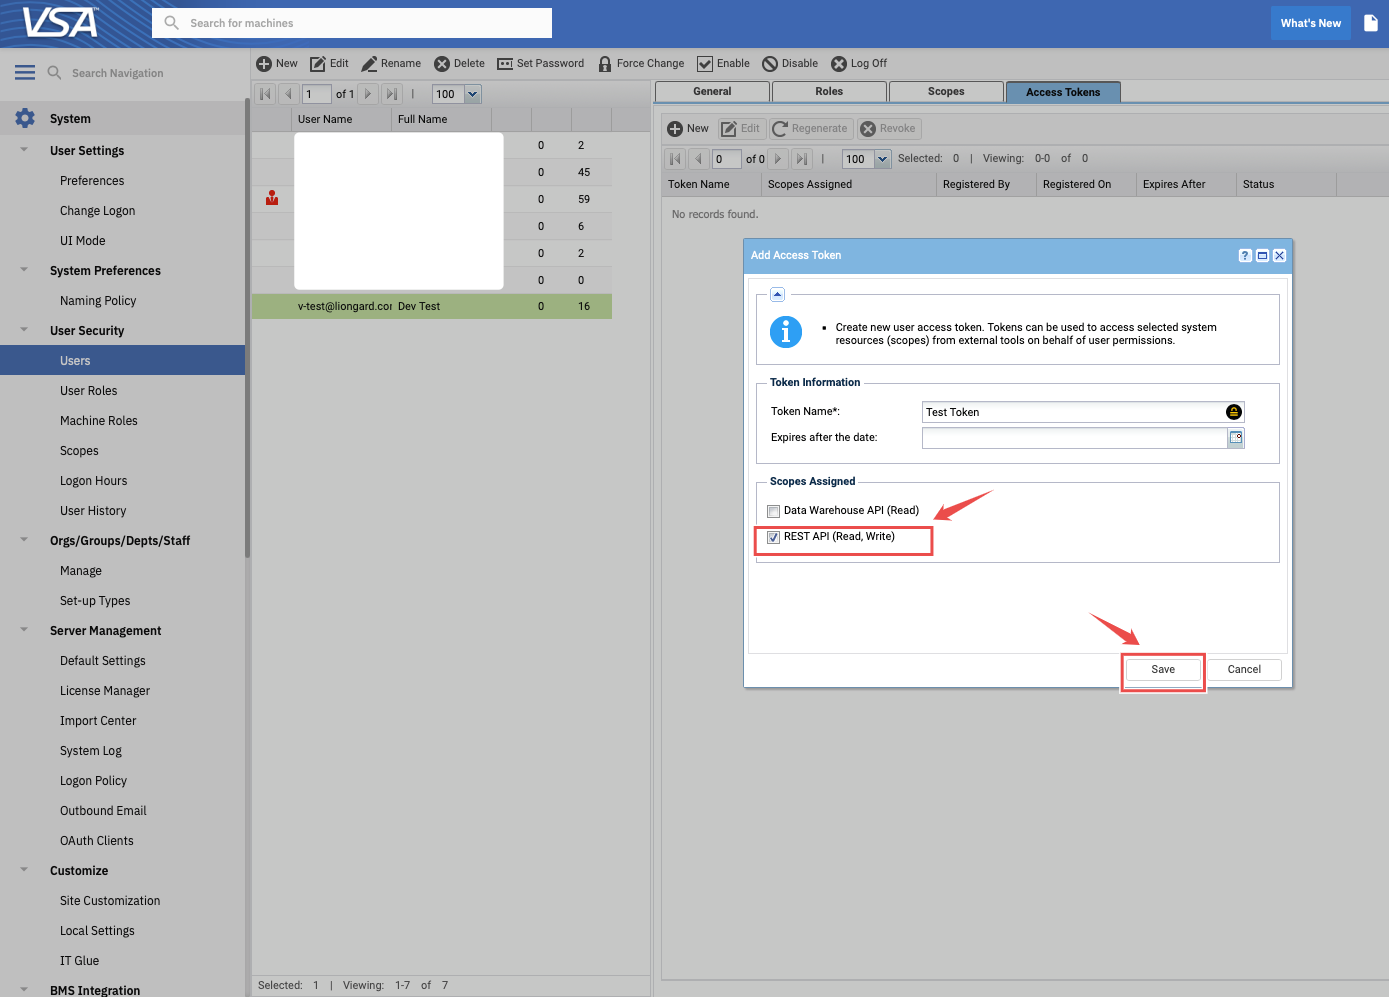
Step 7: Copy the generated token.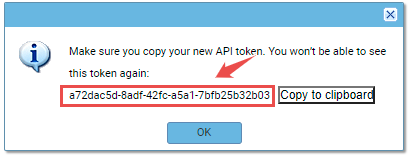
Step 9: The expiration period is the parameter that the user sets during token creation. Access to data is controlled by the scope assigned to this user.
Step 10: The VSA URL is the server name and it is present in the URL of login page(2).png)
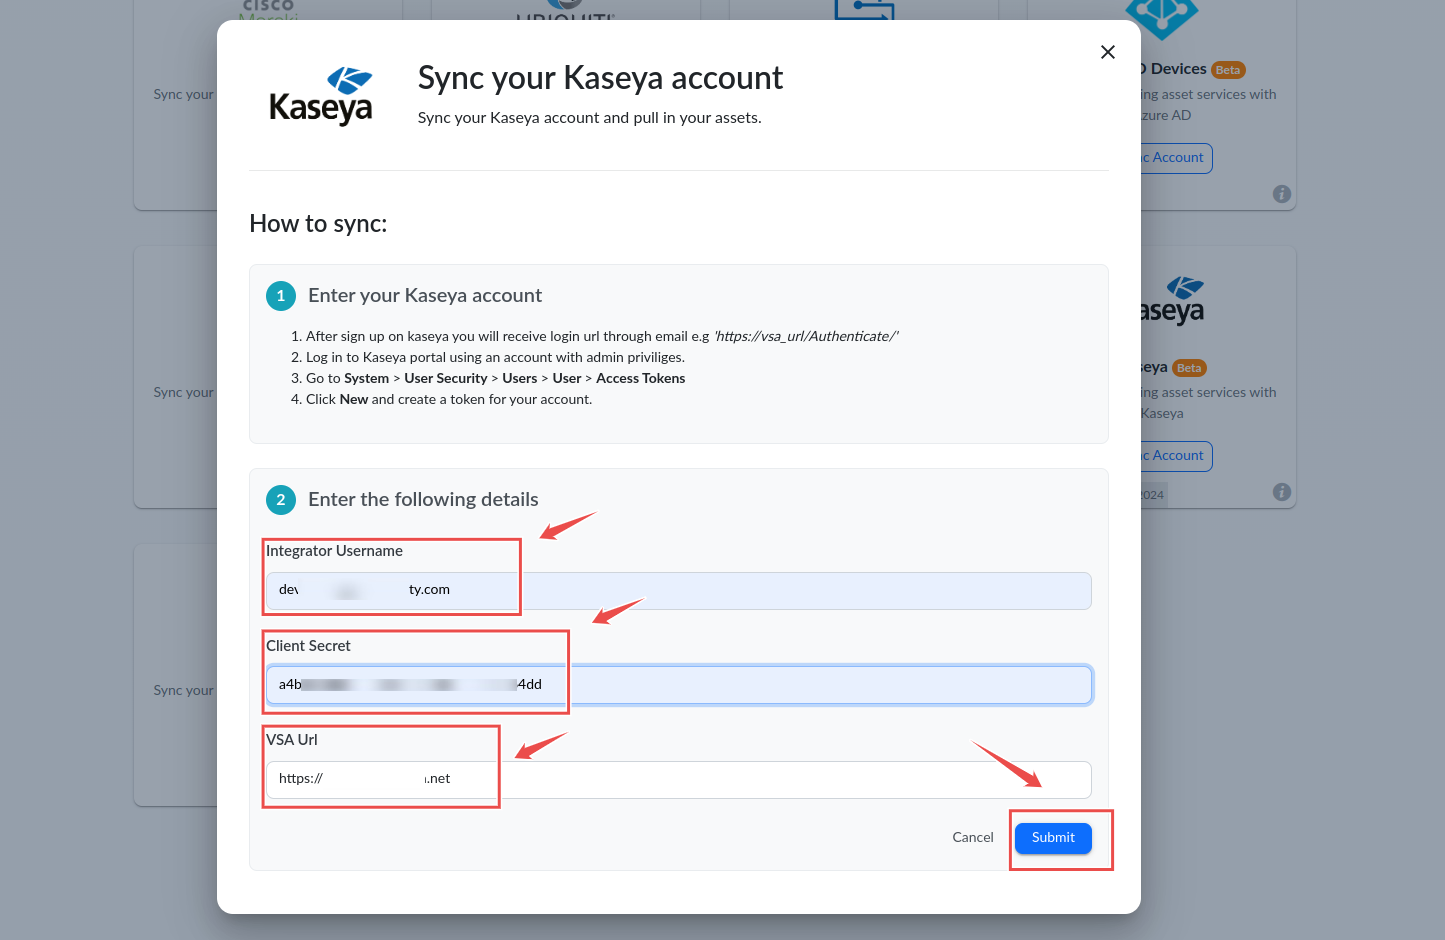
Instructions for Genuity side Integration.
Step1: Navigate to Manage Assets > Discovery Tools > Connectors > Kaseya.
Step2: Enter Integrator Username (Username which you have created in VSA), Client Secret (access token you have copied to clipboard) and VSA URL . Click on Submit for the connection.